Product Features | Eve Outdoor Cam

All features of Eve Outdoor Cam

May 17, 2022 - by Lars - Comments


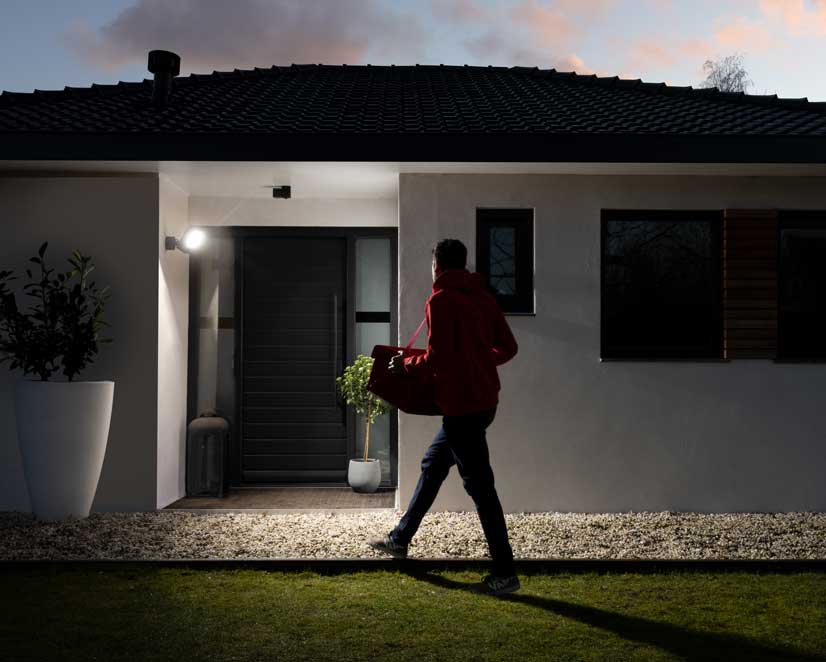
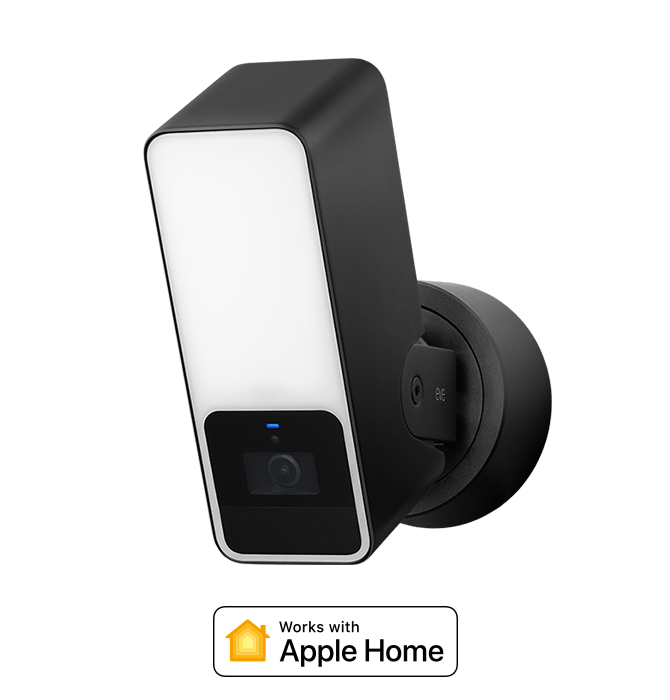
As the first floodlight camera designed exclusively for HomeKit Secure Video, Eve Outdoor Cam perfectly represents Eve's values: Thanks to Apple's technology, it represents the state of the art in terms of functionality, privacy and security. And it is enriched with important additional features through the Eve app – naturally without registration, cloud connection, tracking or profiling.  


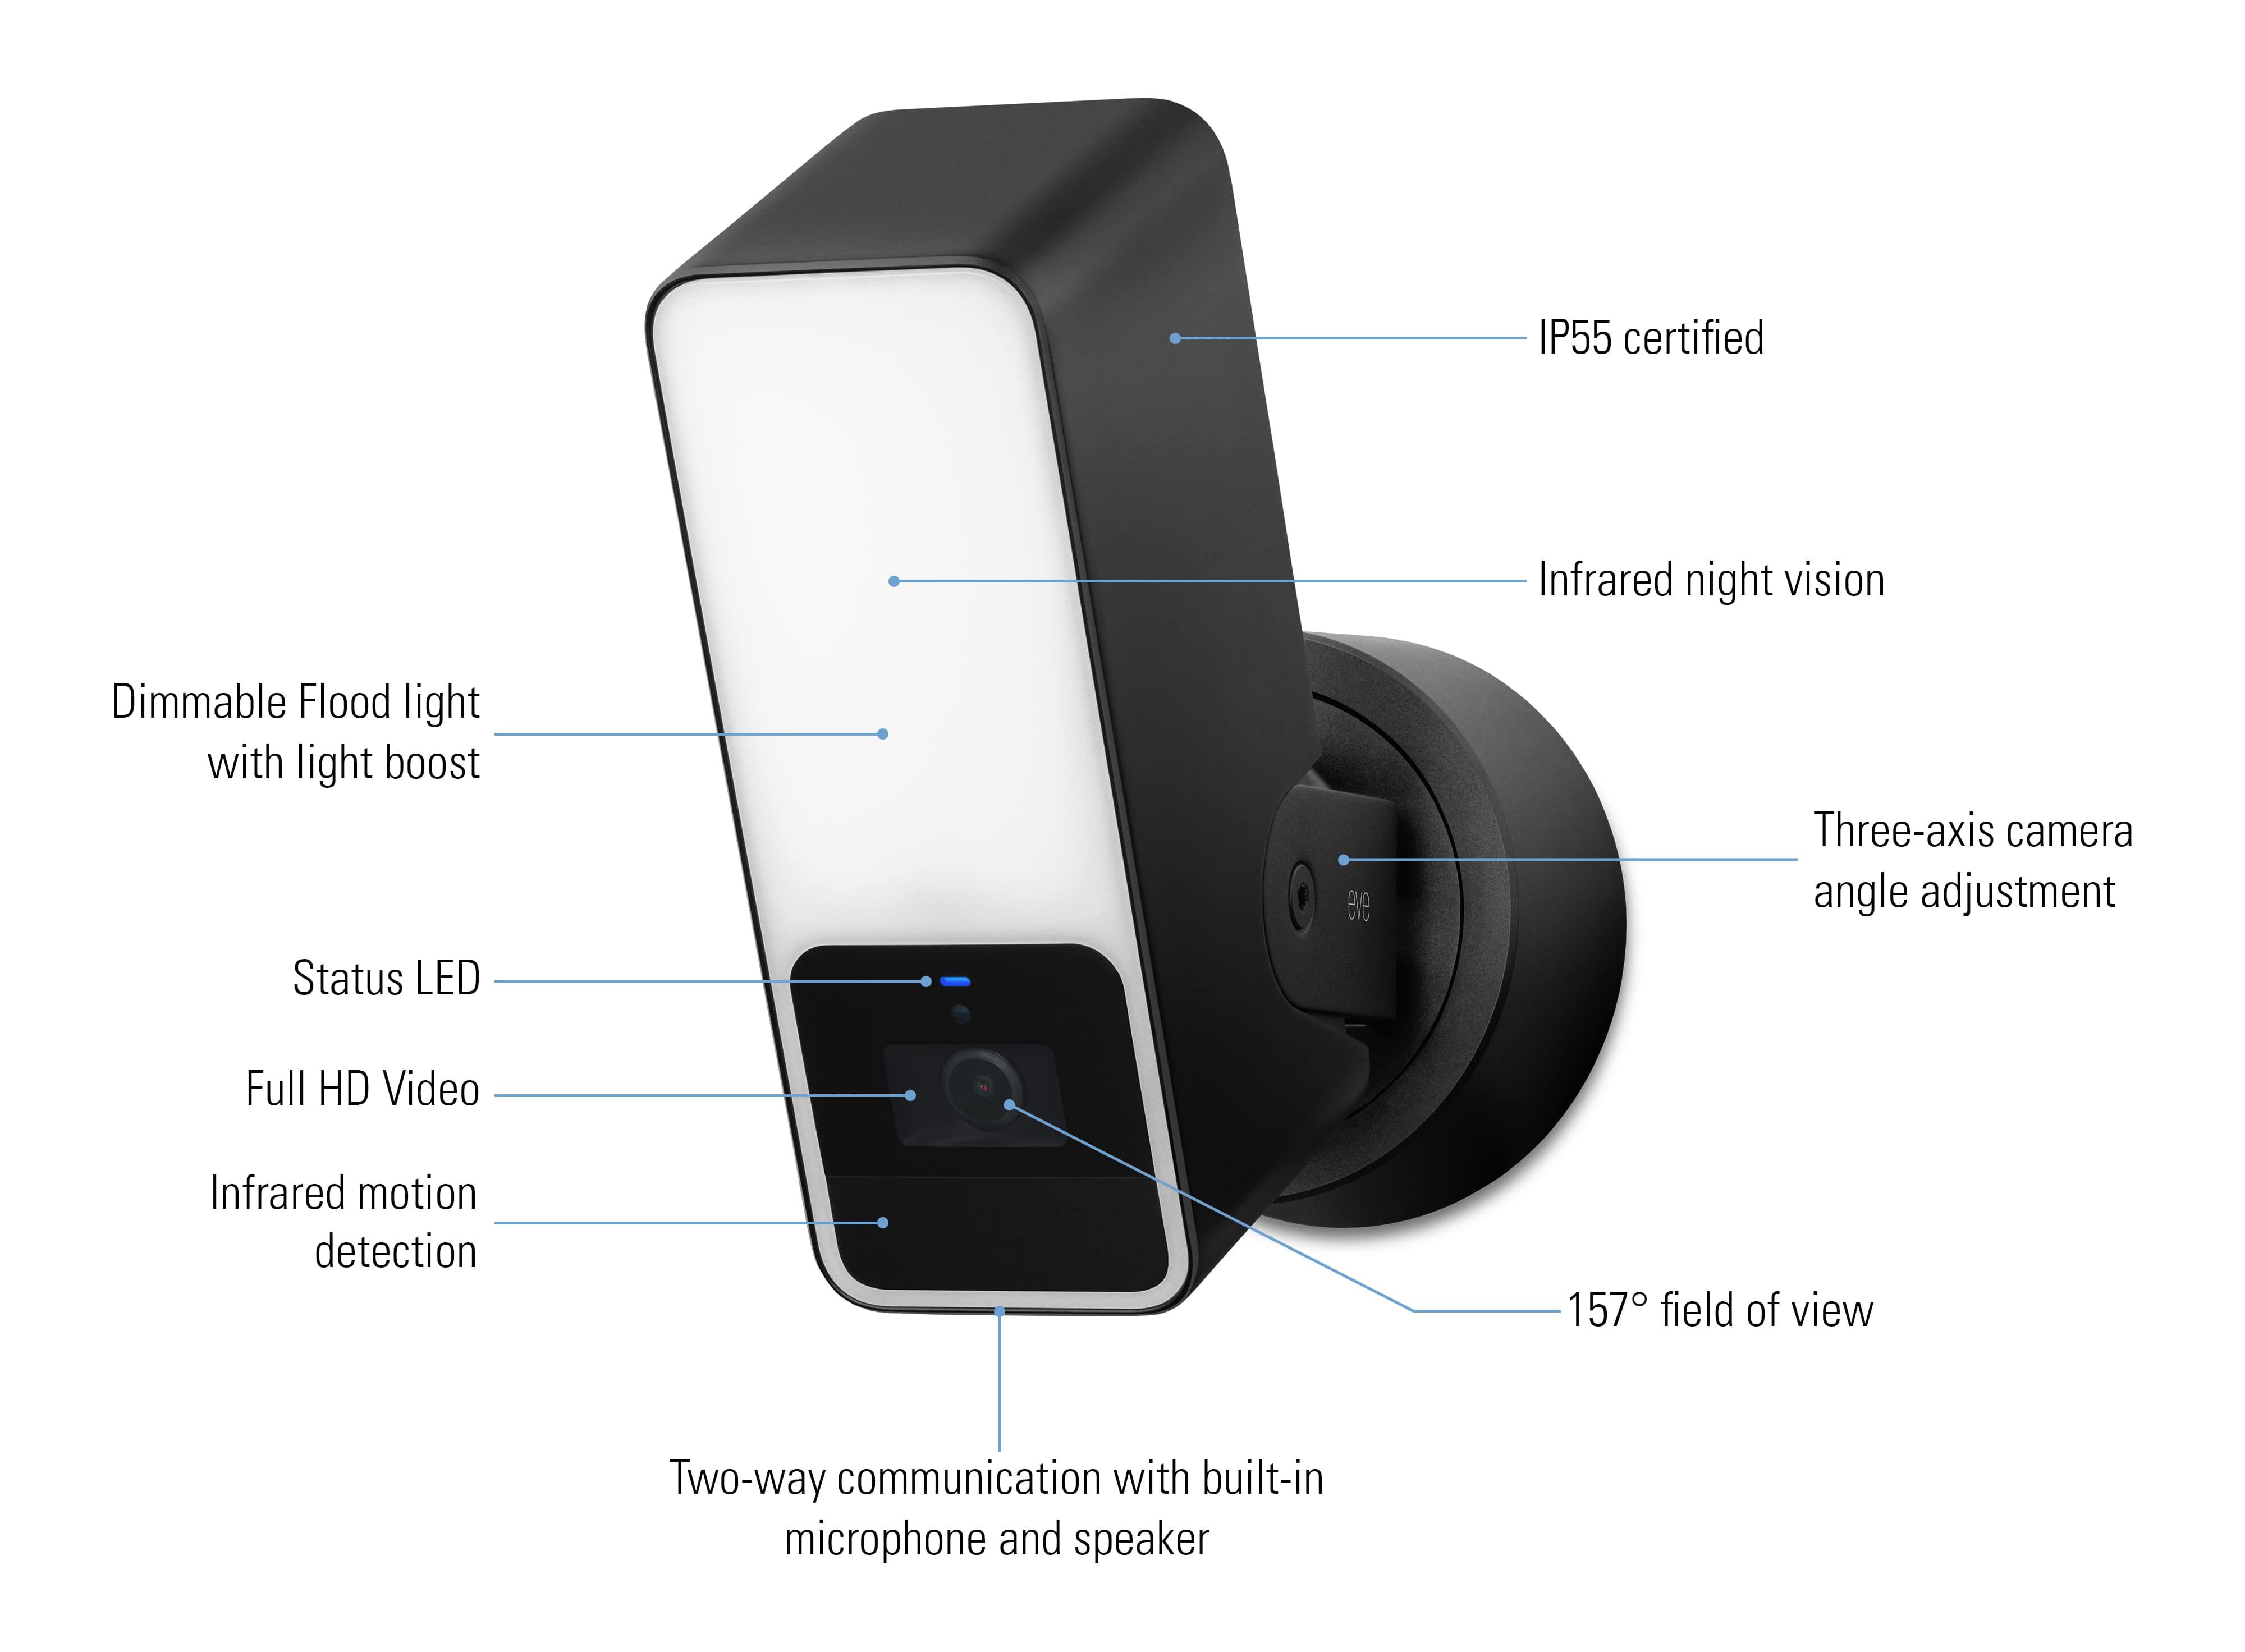
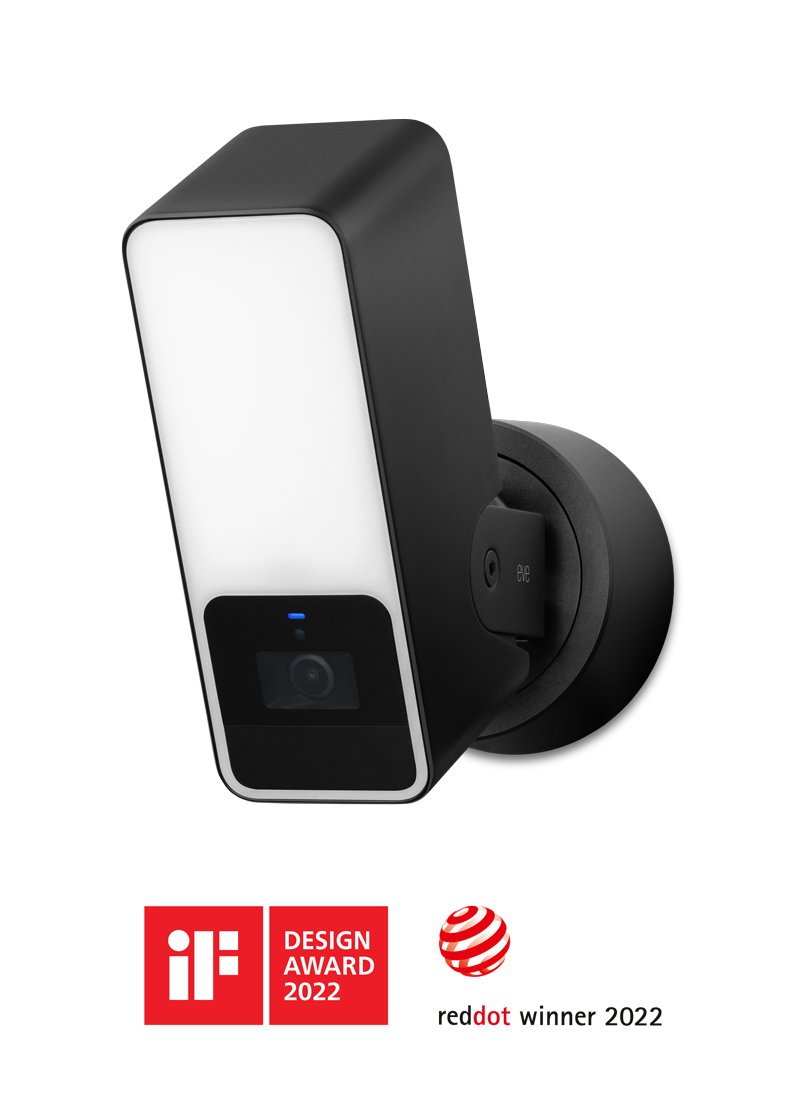
The hardware itself, which has won the Red Dot and iF Design Awards, also meets the highest standards. It is characterized by a slim, one-piece housing with a metal frame, a compact base, and a three-axis joint. This means you can install and adjust Eve Outdoor Cam flexibly. Its appearance is always striking – but without looking out of place. 


In this article, you'll learn about Eve Outdoor Cam and get tips on placement, setup, automation, and troubleshooting.
Eve Outdoor Cam is designed exclusively for HomeKit – and with Apple HomeKit Secure Video, everything is analyzed locally. This means you don’t have to worry about your data being streamed to some random server in the ether as Eve rather relies on your Apple infrastructure. You set the criteria for when your recordings are stored fully encrypted in your iCloud account. And only your personal devices have the key to unlock and show these recordings. 


The live stream from Eve Outdoor Cam never touches a cloud – not even iCloud. 


Learn how HomeKit Secure Video works. More information about the security architecture underlying HomeKit technology is available in the Apple Platform Security document. It explains how the encryption architecture of HomeKit and HomeKit Secure Video are designed. 

Hardware & requirements

What's where on your Eve Outdoor Cam? The front of Eve Outdoor Cam's IP55-rated aluminum housing is adorned with an opaque white bezel behind which the LEDs of the dimmable floodlight operate, including the functions brightness boost and infrared night vision illumination. Below it are the full-HD camera with its wide-angle field of view of 157°, the infrared motion sensor with a range of 9 m and a detection angle of 100° (at a mounting height of 2.50 m), microphone and speaker, and the status LED. 


The connection to the base is made by the joint, which allows rotation in three axes and whose bracket, like the frame of the camera body, is made of metal. 
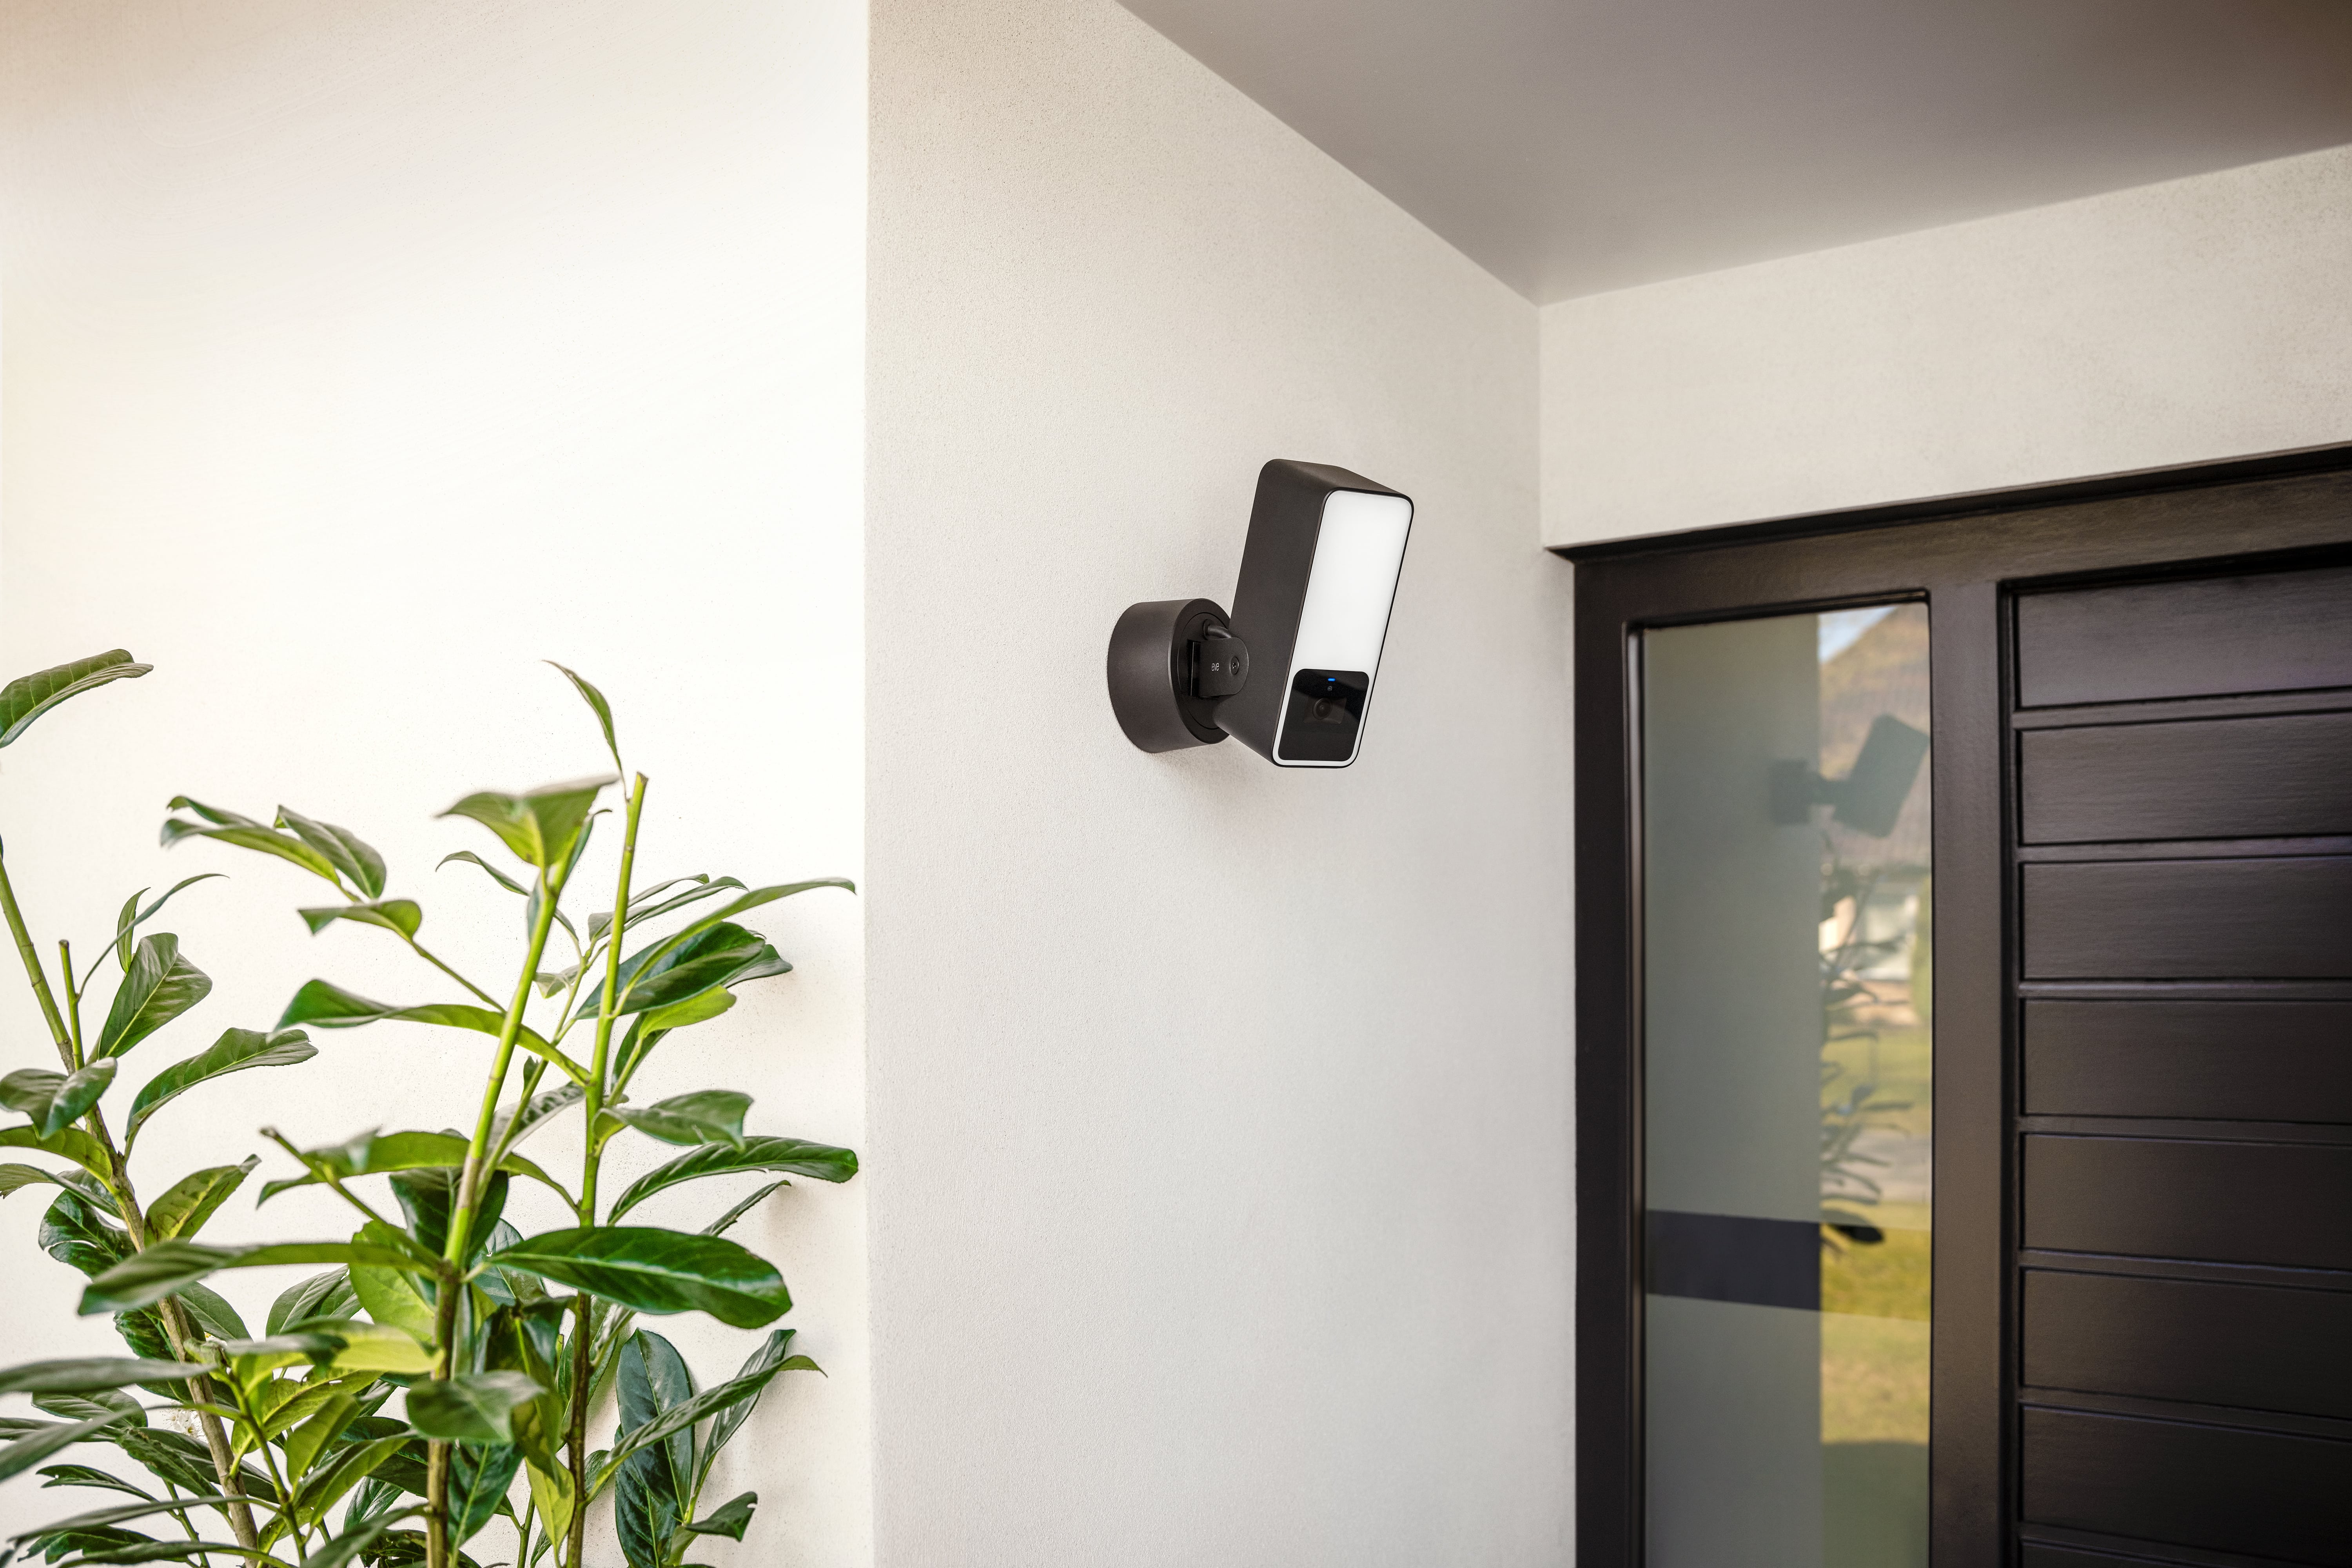
What are the structural requirements for the location of your Eve Outdoor Cam? You screw the base onto an outer wall, ideally in place of an existing light or wherever there is a mounting option along with a power supply with neutral conductor (N, blue), outer conductor (L, brown) and protective conductor (PE, yellow-green). 


You connect the Eve Outdoor Cam to your 2.4 GHz WLAN. This band is more suitable for outdoor devices than the 5 GHz band, because in practice it is less sensitive to damping structural elements, i.e. walls. If your WLAN signal is not sufficient for where you want to install the camera, place the router closer – if possible – or use a WLAN repeater or additional mesh node.


Detailed installation instructions for Eve Outdoor Cam are available as a video and as a PDF


Please note: if you are unsure or uncomfortable about installing Eve Outdoor Cam, consult a qualified electrician. To be installed and/or used in accordance with appropriate electrical codes and regulations.


Place of installation

Eve Outdoor Cam's design, which combines camera, floodlight, and motion sensor in one housing, makes alignment especially easy. No matter which position you rotate, tilt and pan the camera, the monitored, illuminated and recorded areas are always in line. 


The infrared motion sensor cannot see through glass, so Eve Outdoor Cam should not operate behind or above balcony glazing. Reflected light from the night vision LEDs can significantly affect image quality. Therefore, keep walls, other surfaces and objects from protruding into the illuminated area.


Please follow the applicable law regarding video surveillance of private property. Use the adhesive labels included with the camera to warn visitors that they may be recorded.  

Basic settings for HomeKit Secure Video

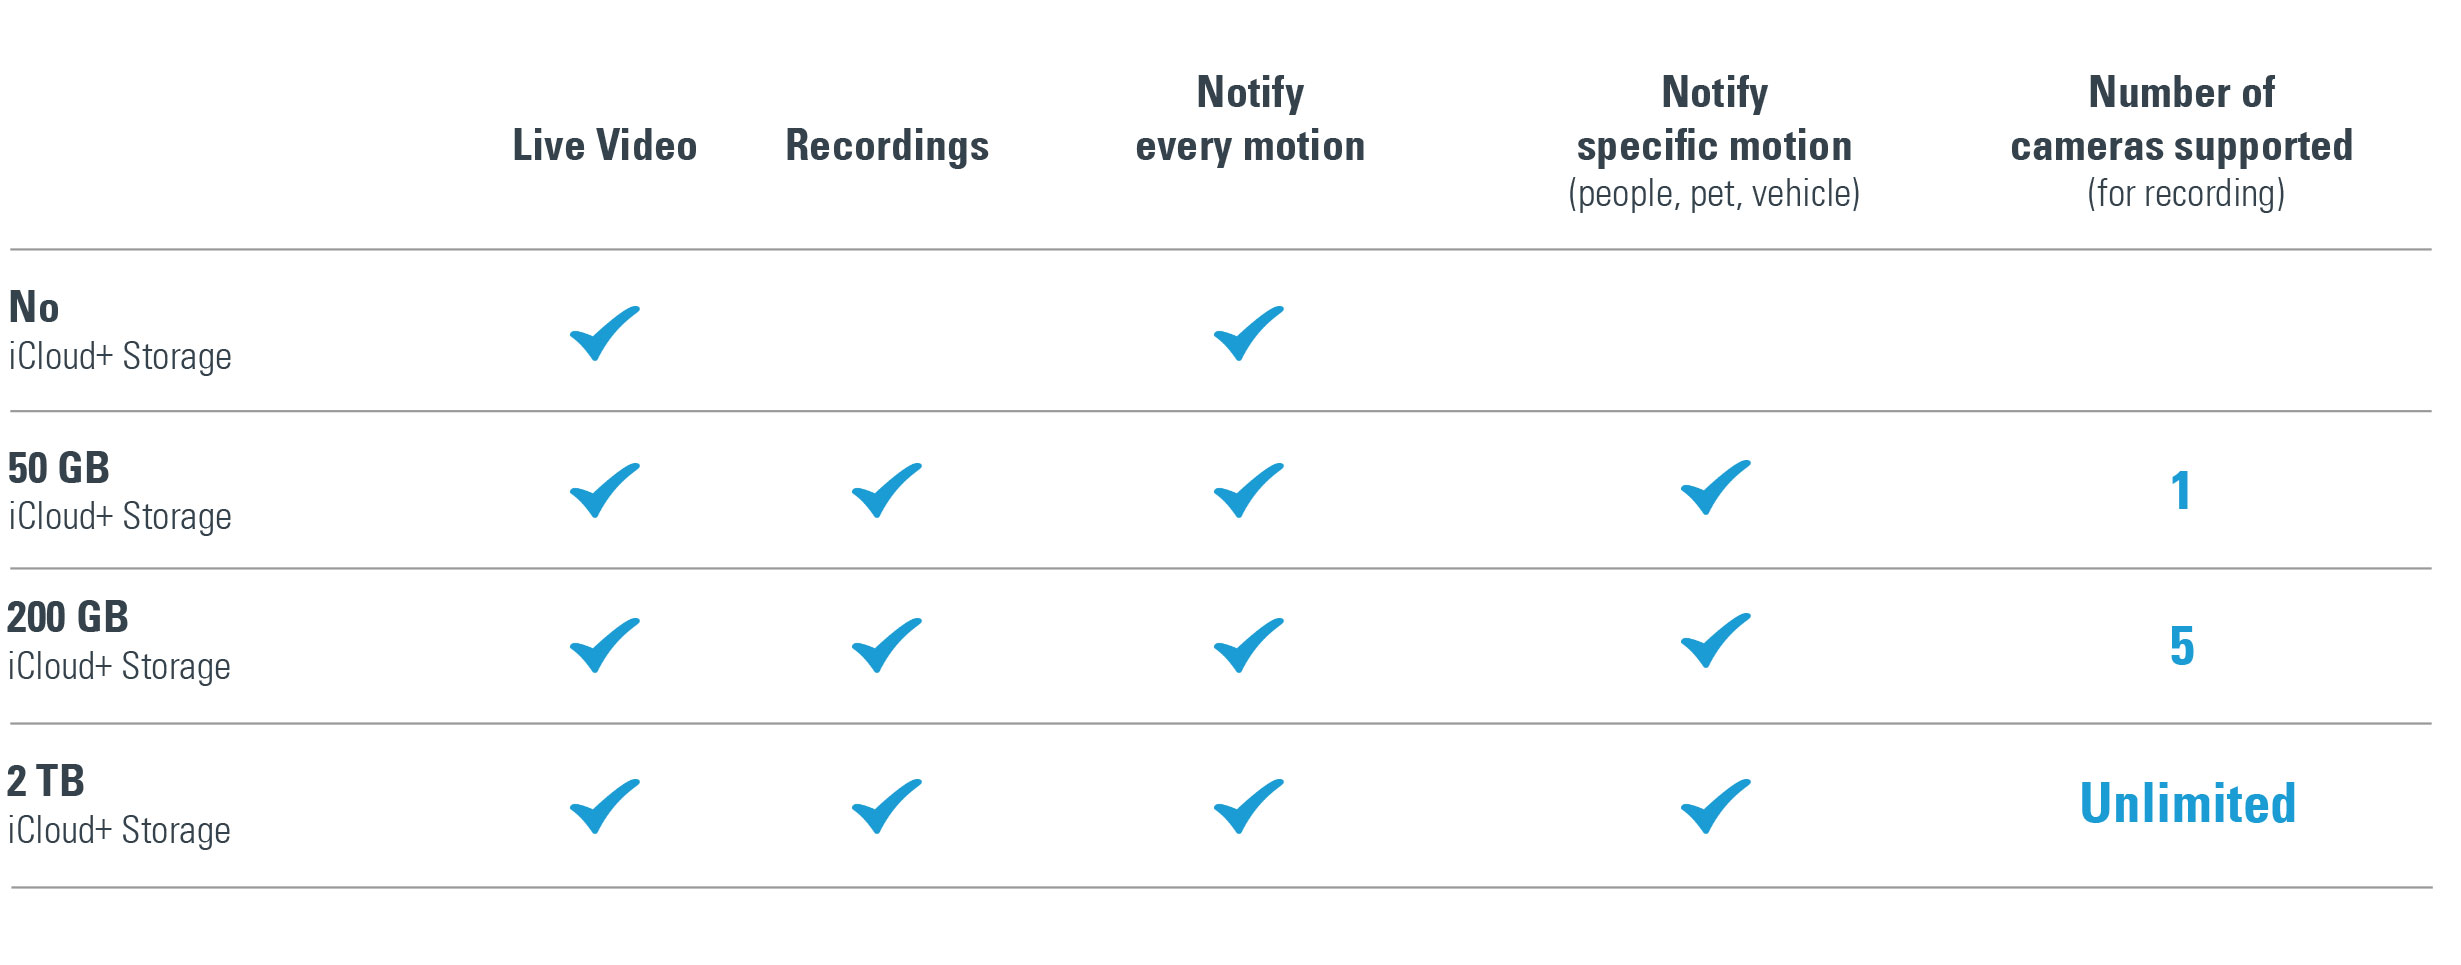
To distinguish between footage of animals, people, vehicles, and packages, and to benefit from iCloud-supported recording capability, you need a supported iCloud storage plan. You can connect a single camera to a 50 GB storage plan. And if you’ve got up to five cameras – whether Eve Outdoor Cam or another vendor’s product that utilizes HomeKit Secure Video – you’ll need a 200 GB plan. If you book 2 TB of storage, you can run an unlimited number of cameras with full functionality. The encrypted recordings are stored securely for ten days in your personal iCloud account without them counting against your iCloud storage limit, no matter how much space you've paid for.
Launch the Eve app, open the settings, tap "Add Device" and scan the HomeKit setup code of your Eve Outdoor Cam (it's stuck on the wall plate and manual, please keep it safe). Once you’ve added your Eve Cam, you then configure the basic settings of the camera that HomeKit will associate with the location of your iPhone and the devices of the people you invite. Select the monitoring level for the options When Home and When Away:


Off: the camera can’t record, stream live images, send motion-detection notifications or trigger any automations. If people, animals or vehicles move within the field of view, the floodlight will remain off. 


Detect activity: the camera detects motion and can activate the floodlight, trigger automations and send notifications based on this.  


Stream: aside from automations and notifications, this mode also allows you and invited people to access the live stream.


Allow streaming & recording: the camera provides a live stream and can create recordings – either based on any motion that’s detected or motion that’s been caused by people, animals, packages and/or vehicles.


During setup, you can also configure whether invited household members can only view the live stream or also browse recordings.
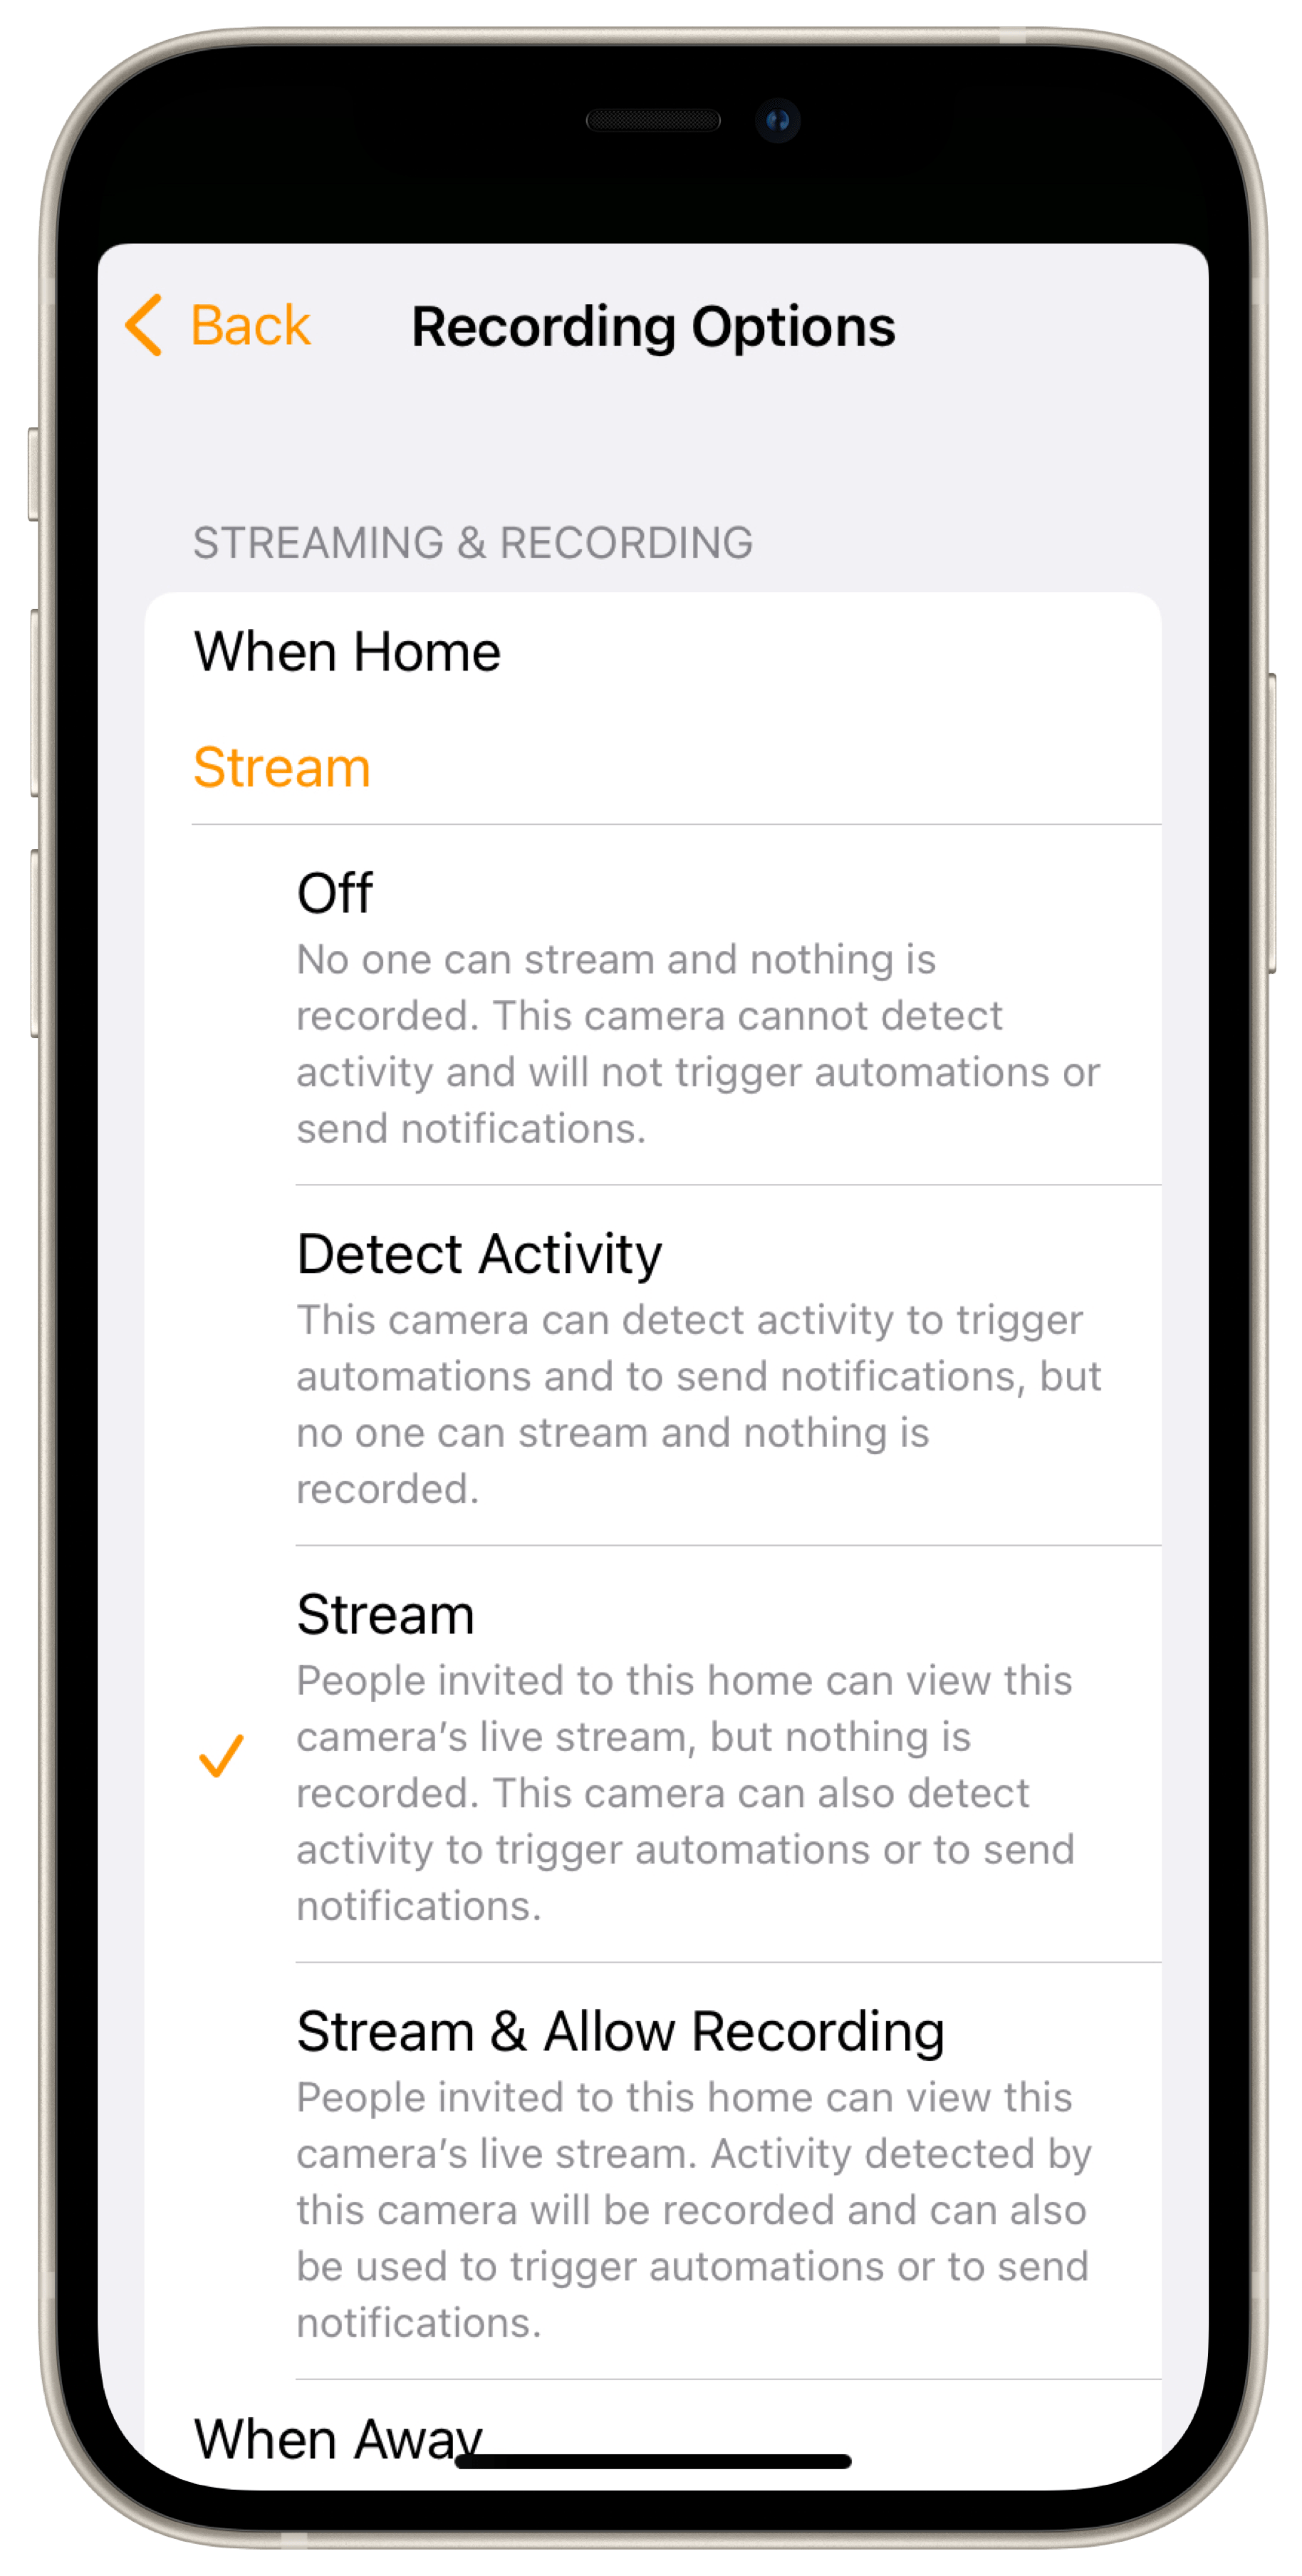
Notification and recording settings

Next, you use the recording settings in the Home app to specify what type of motion should start a recording. You can open the camera settings from the live stream screen of the Home app, which you access by tapping the camera snapshot in the corresponding room view.  

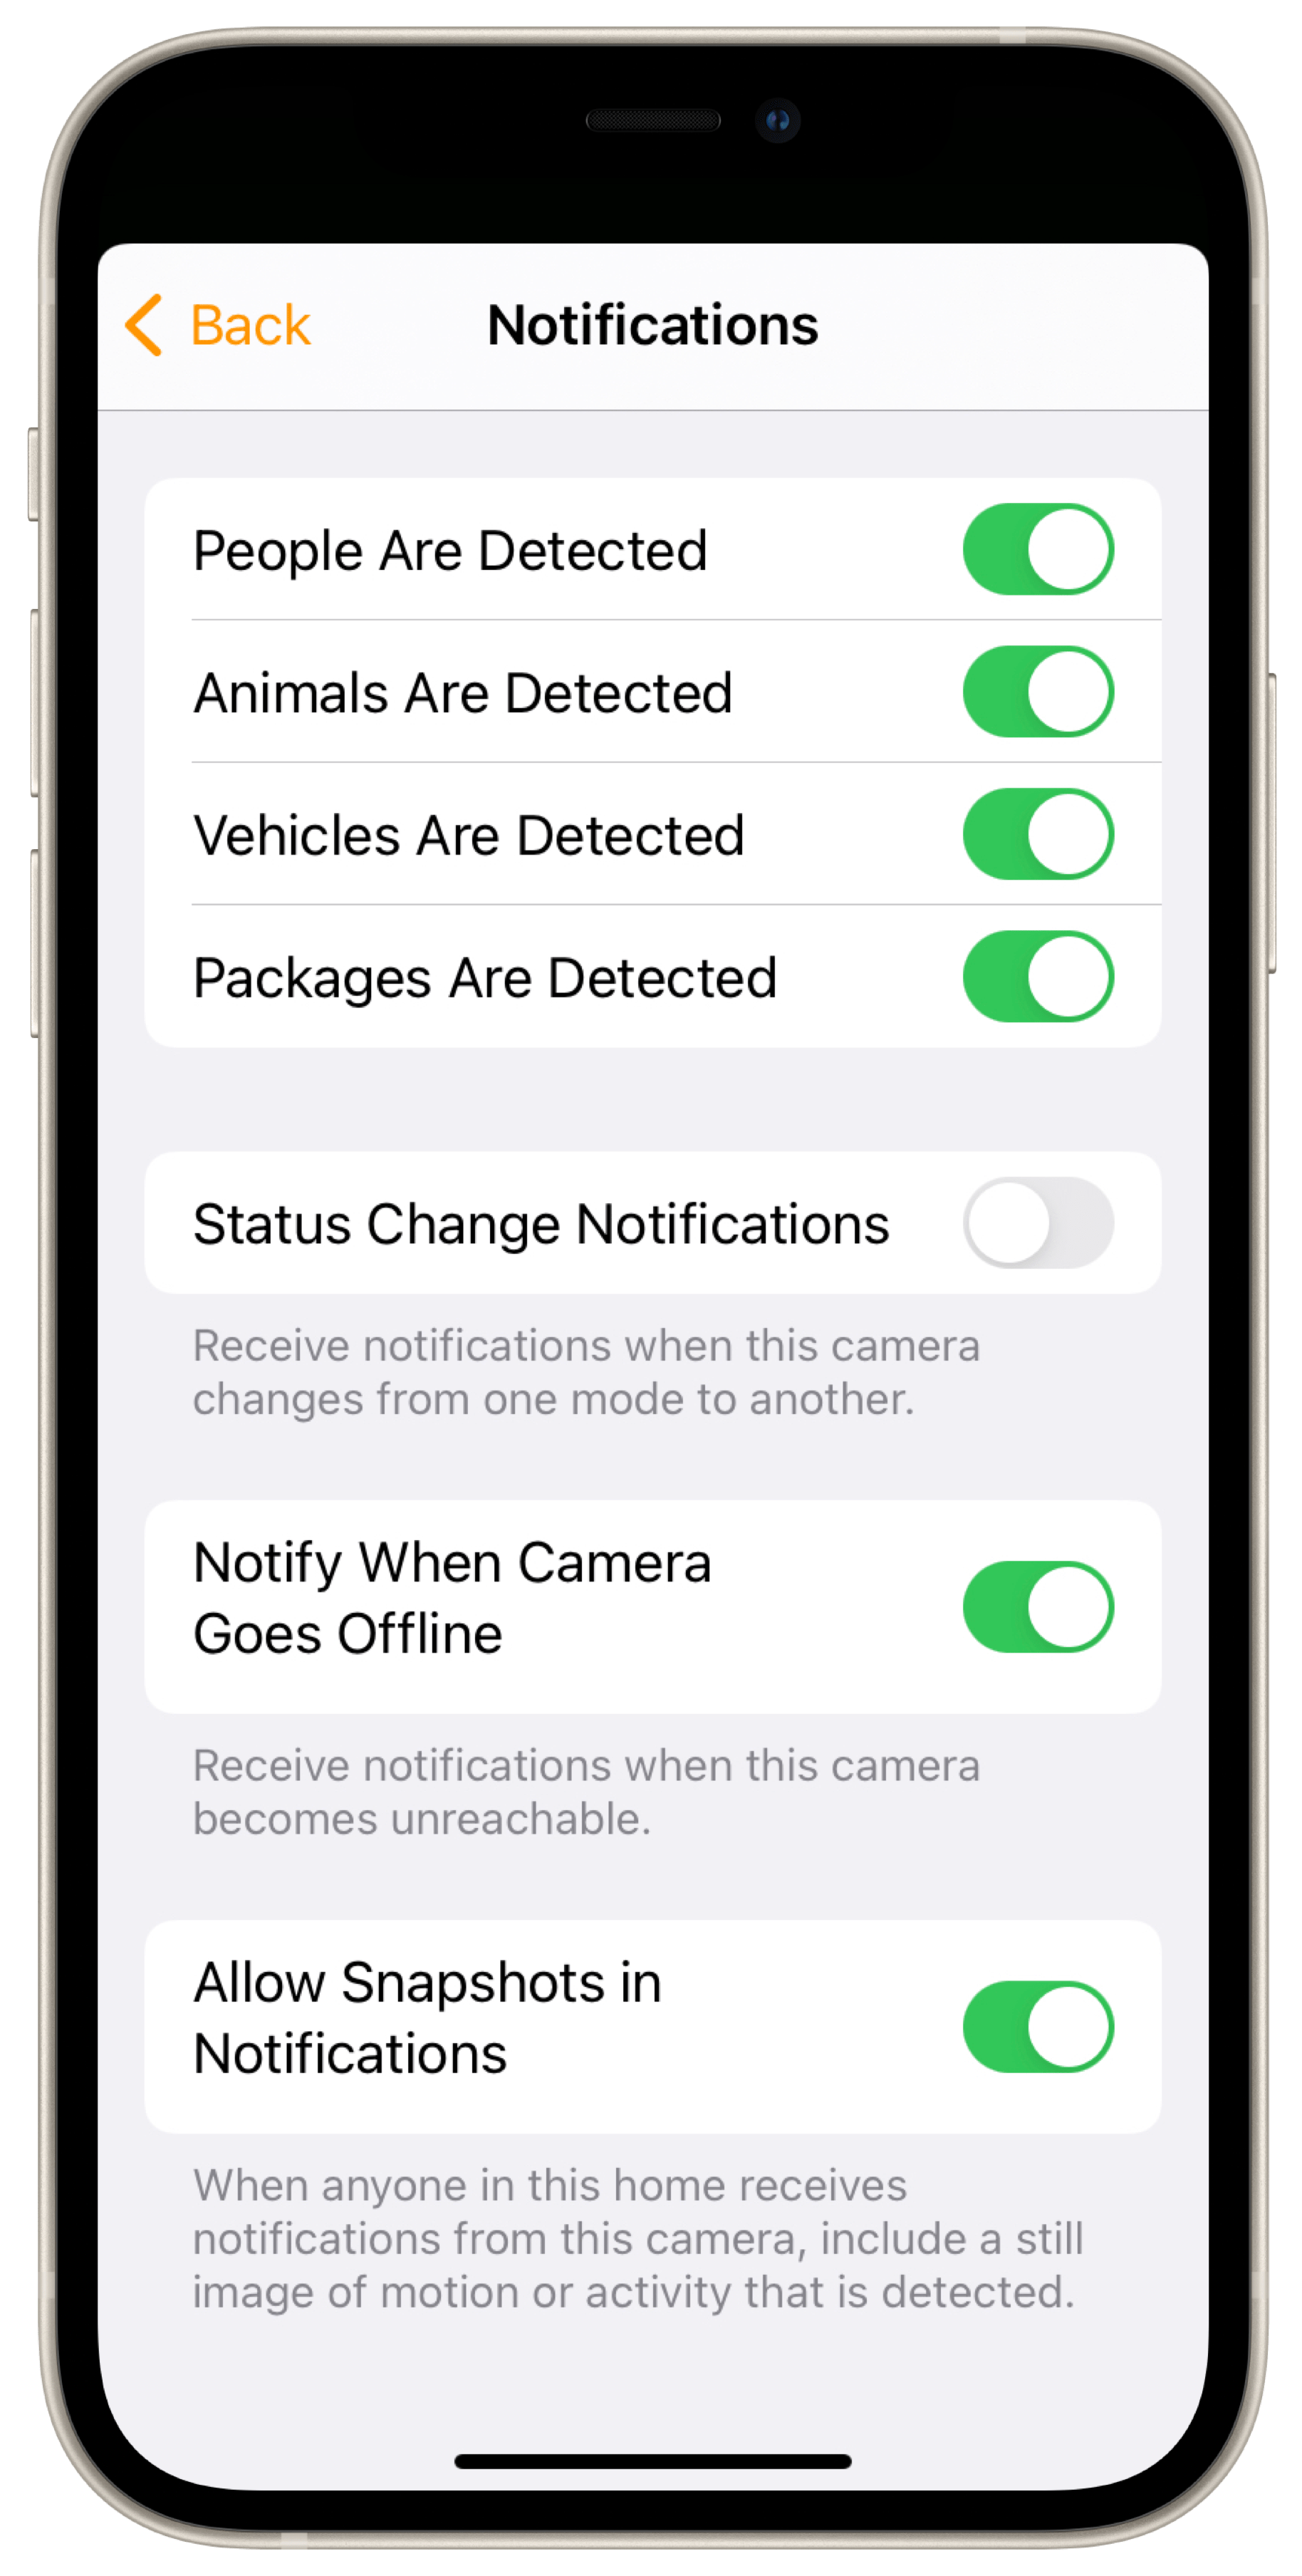
The Notifications options let you set what you want the camera to alert you about. Everyone in your household can customize them to suit. You can choose whether you want to receive notifications together with a snapshot or just text. If you want to know at any time if the camera is armed or disarmed, enable the notifications about status changes and to let you know if the camera is no longer accessible. 

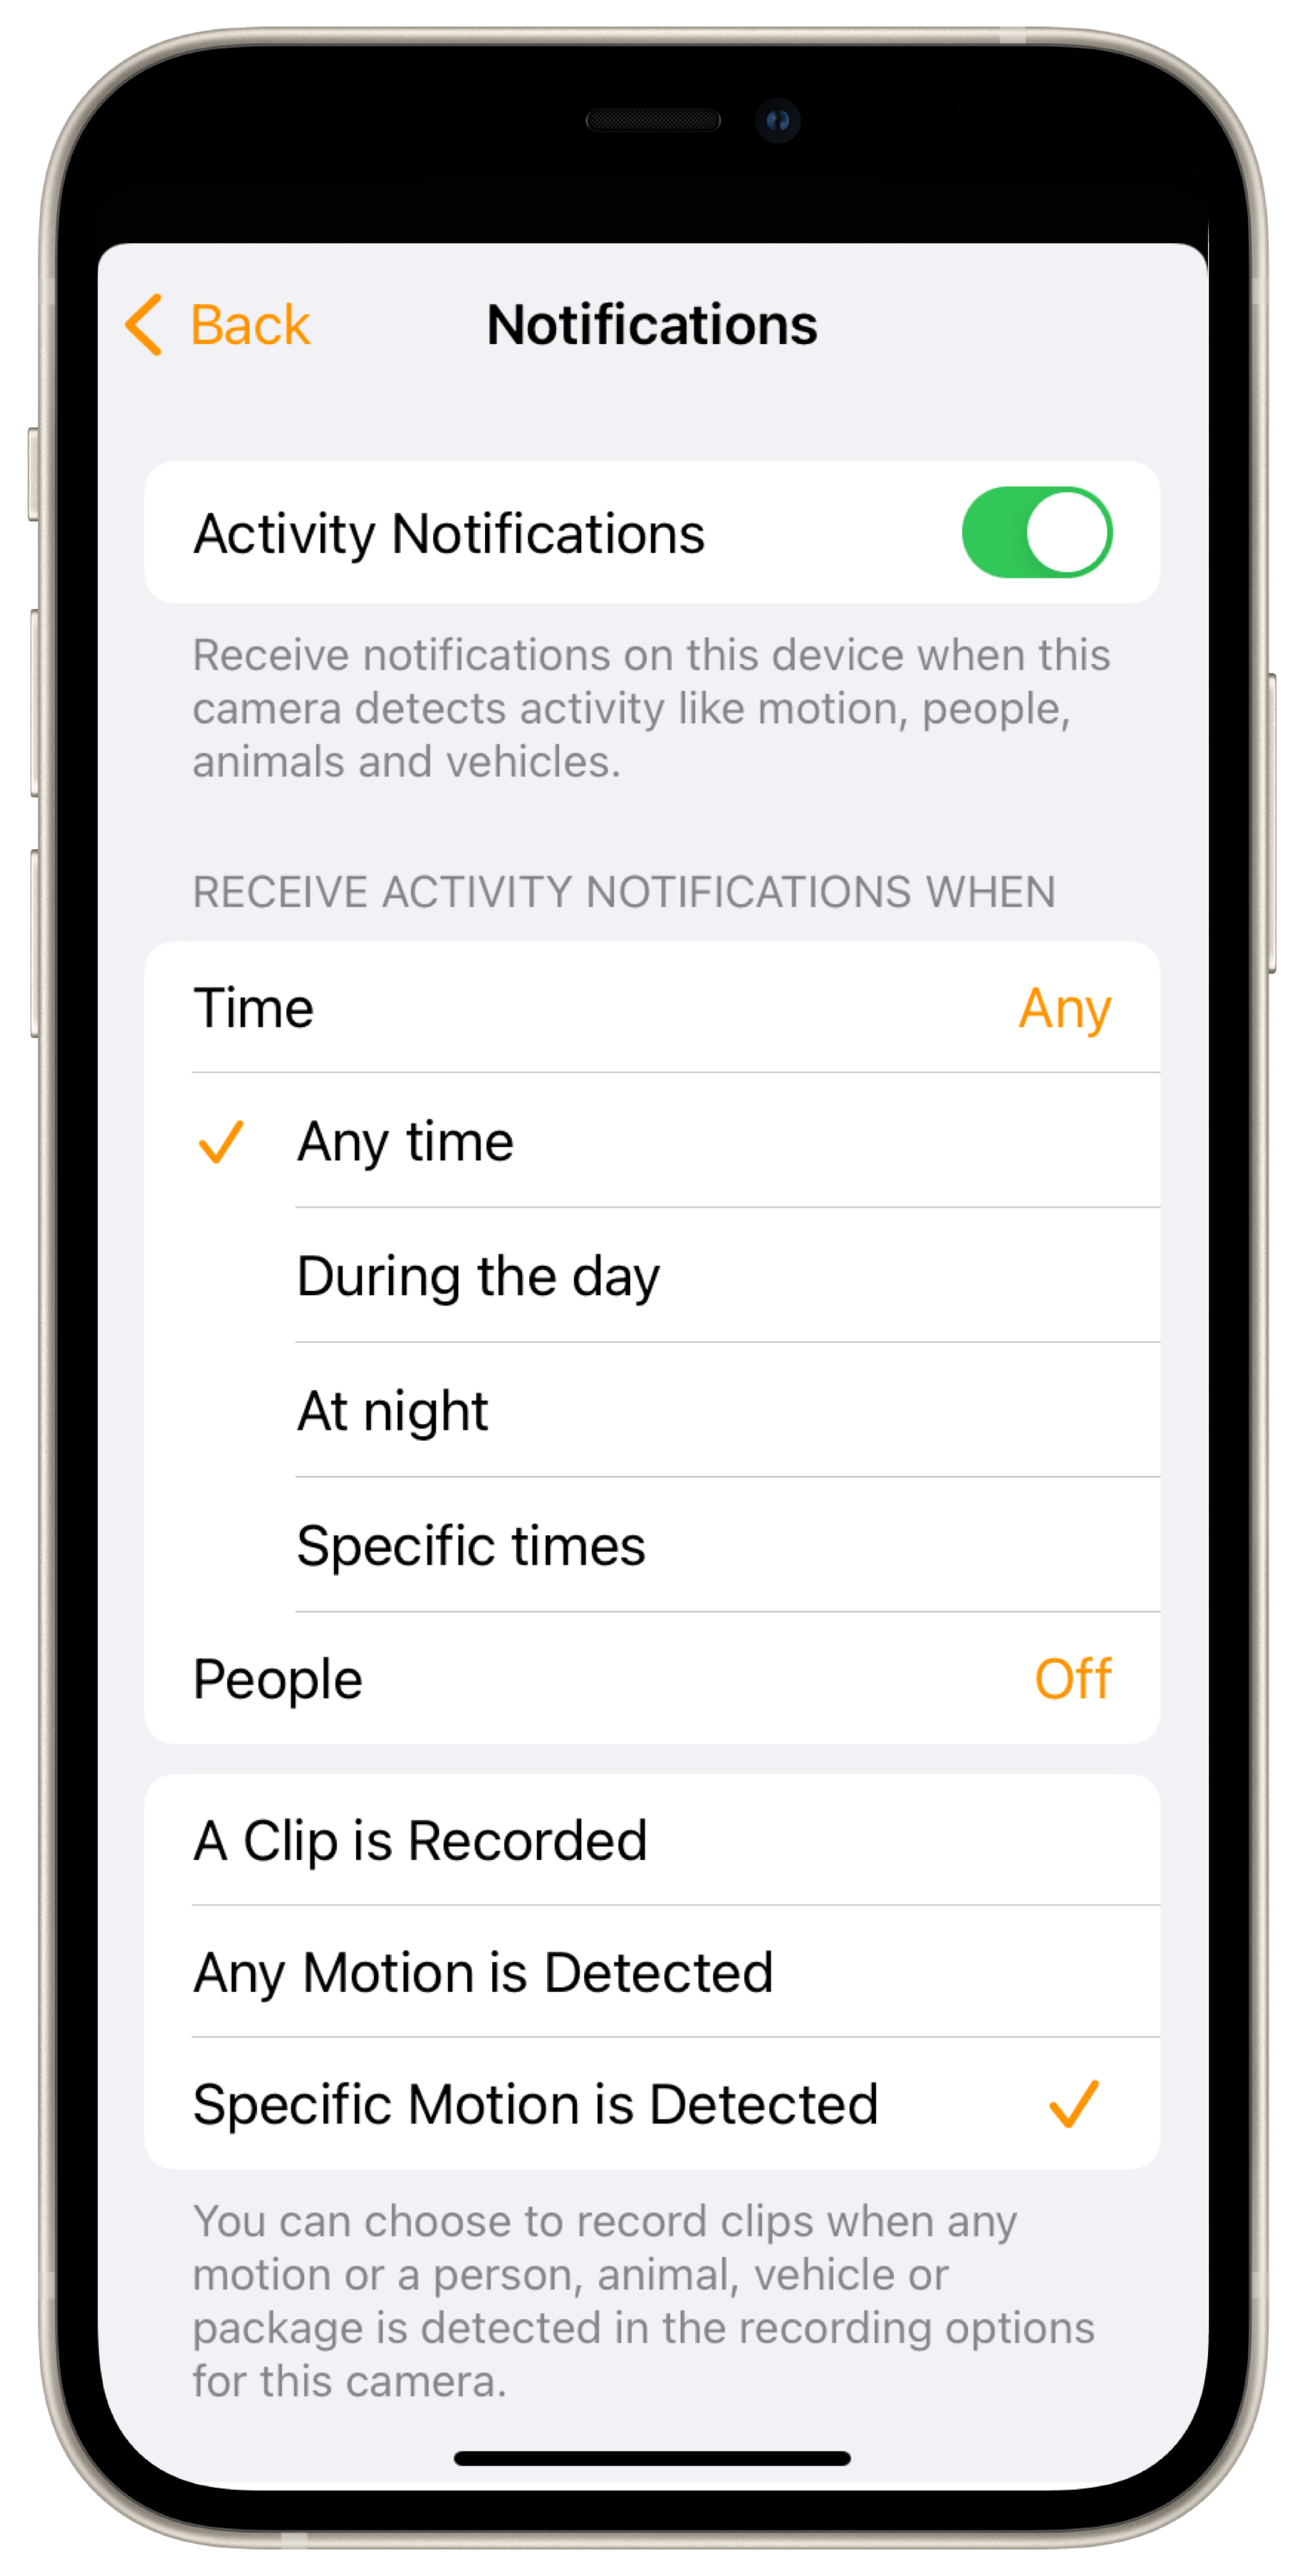
A really great feature that can be customized to suit your security requirements is the option Activity Notifications. You can restrict the option based on time and location conditions, so HomeKit only provides notifications about activities "At night" or "When nobody is home". You can also set whether you want any motion to trigger a notification or only specific ones (people, animals, etc.) or only activities selected within the recording settings (see below).

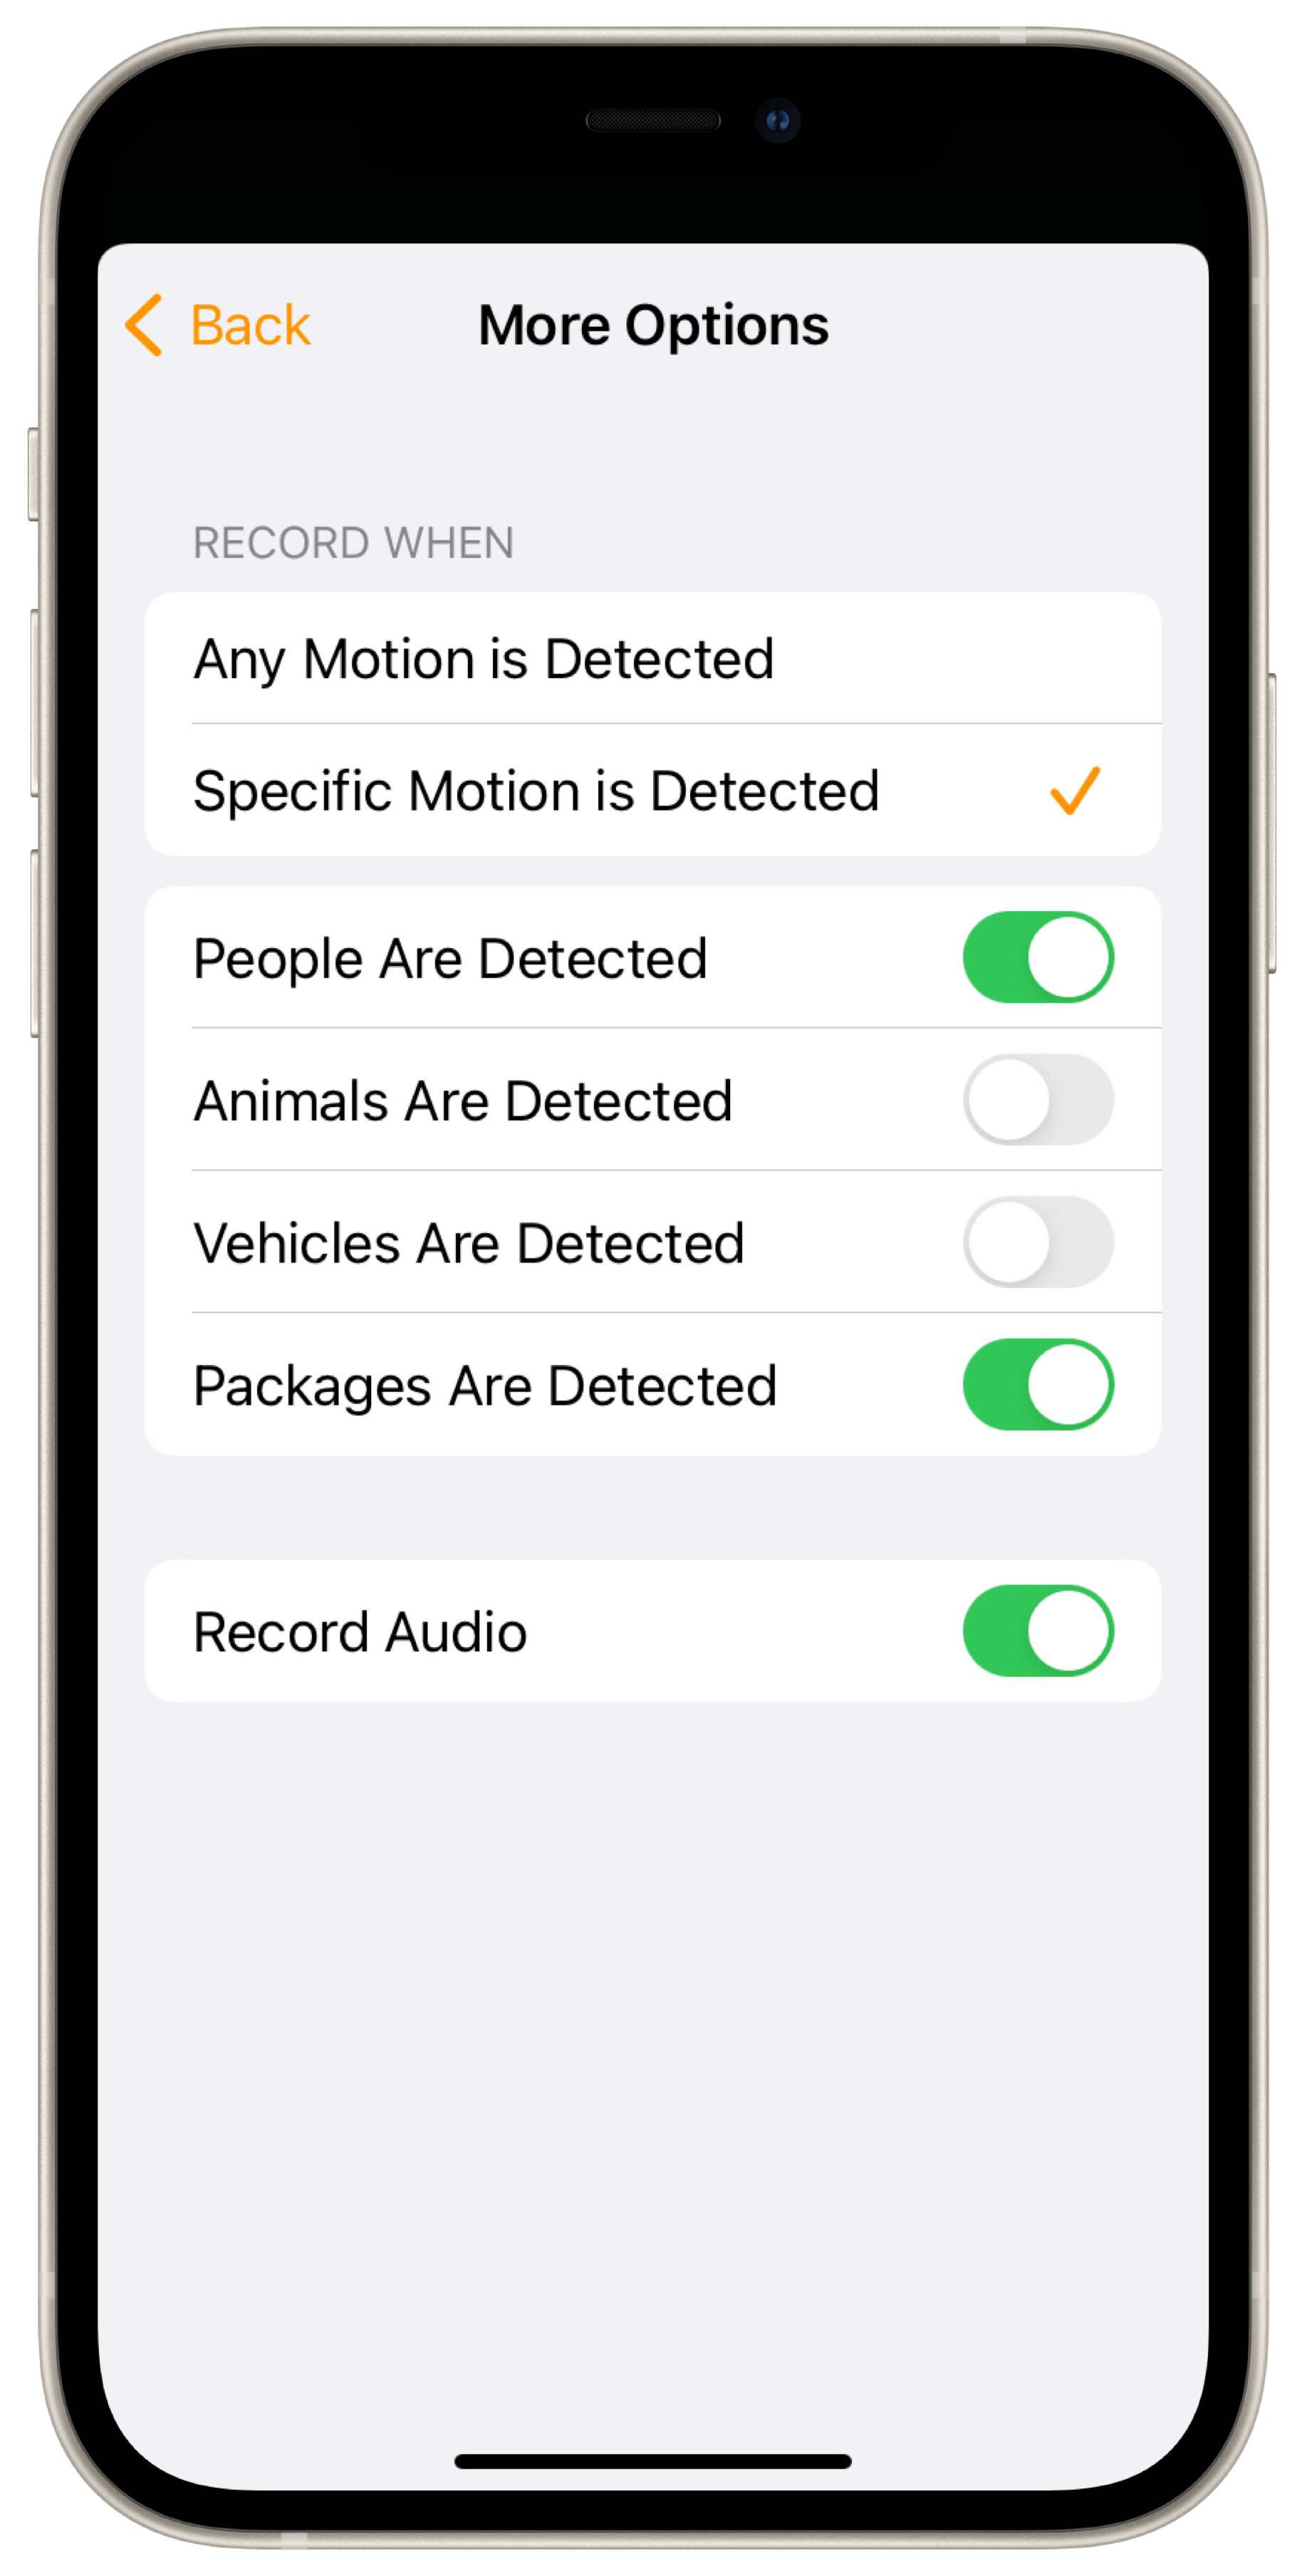
The Streaming & Recording settings section is where you find the basic settings you configured during setup (see above). If you want, you can customise those options here. Tap "Other options" to configure which motion events you want to trigger recording, i.e. any activity or only that of people, animals, packages or vehicles. You can also configure whether you want audio to be recorded alongside the video.

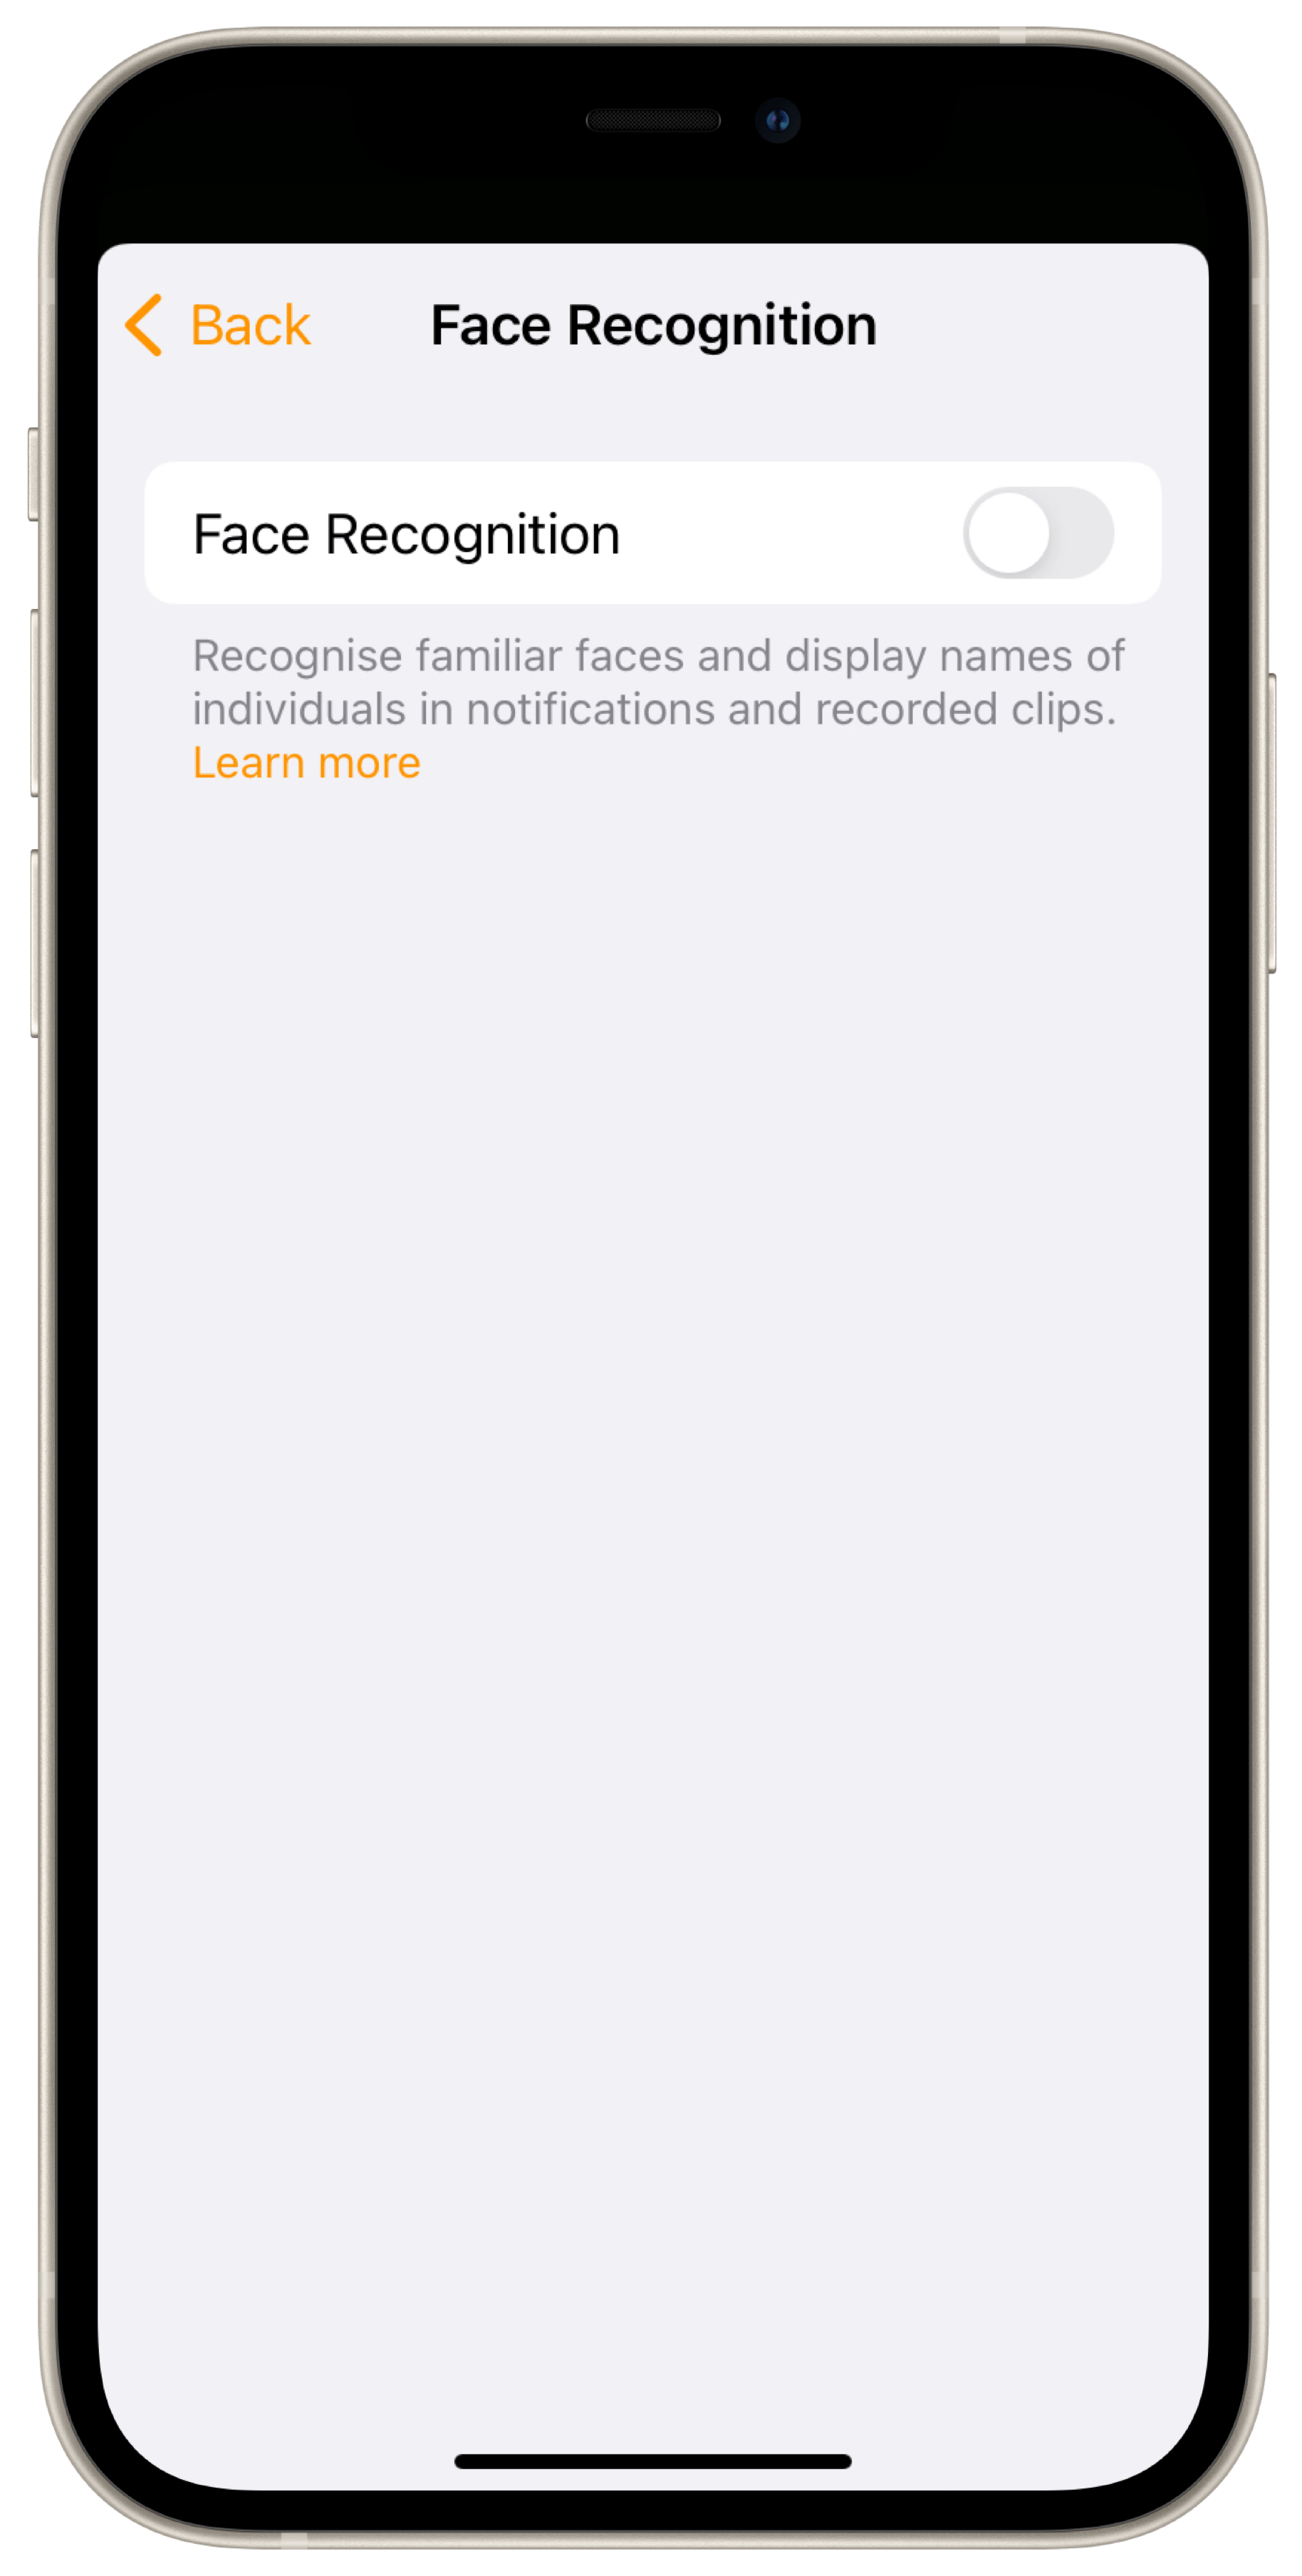
Eve Outdoor Cam provides facial recognition based on the AI features of HomeKit Secure Video. This allows notifications of detected motion to provide specific information about who is currently moving in the camera's field of view. Names can be manually assigned in the Home app to faces in recorded clips. In addition, you can share your photo library or the directory of people with yourself or others in the household. Notifications can be hidden from specific people.

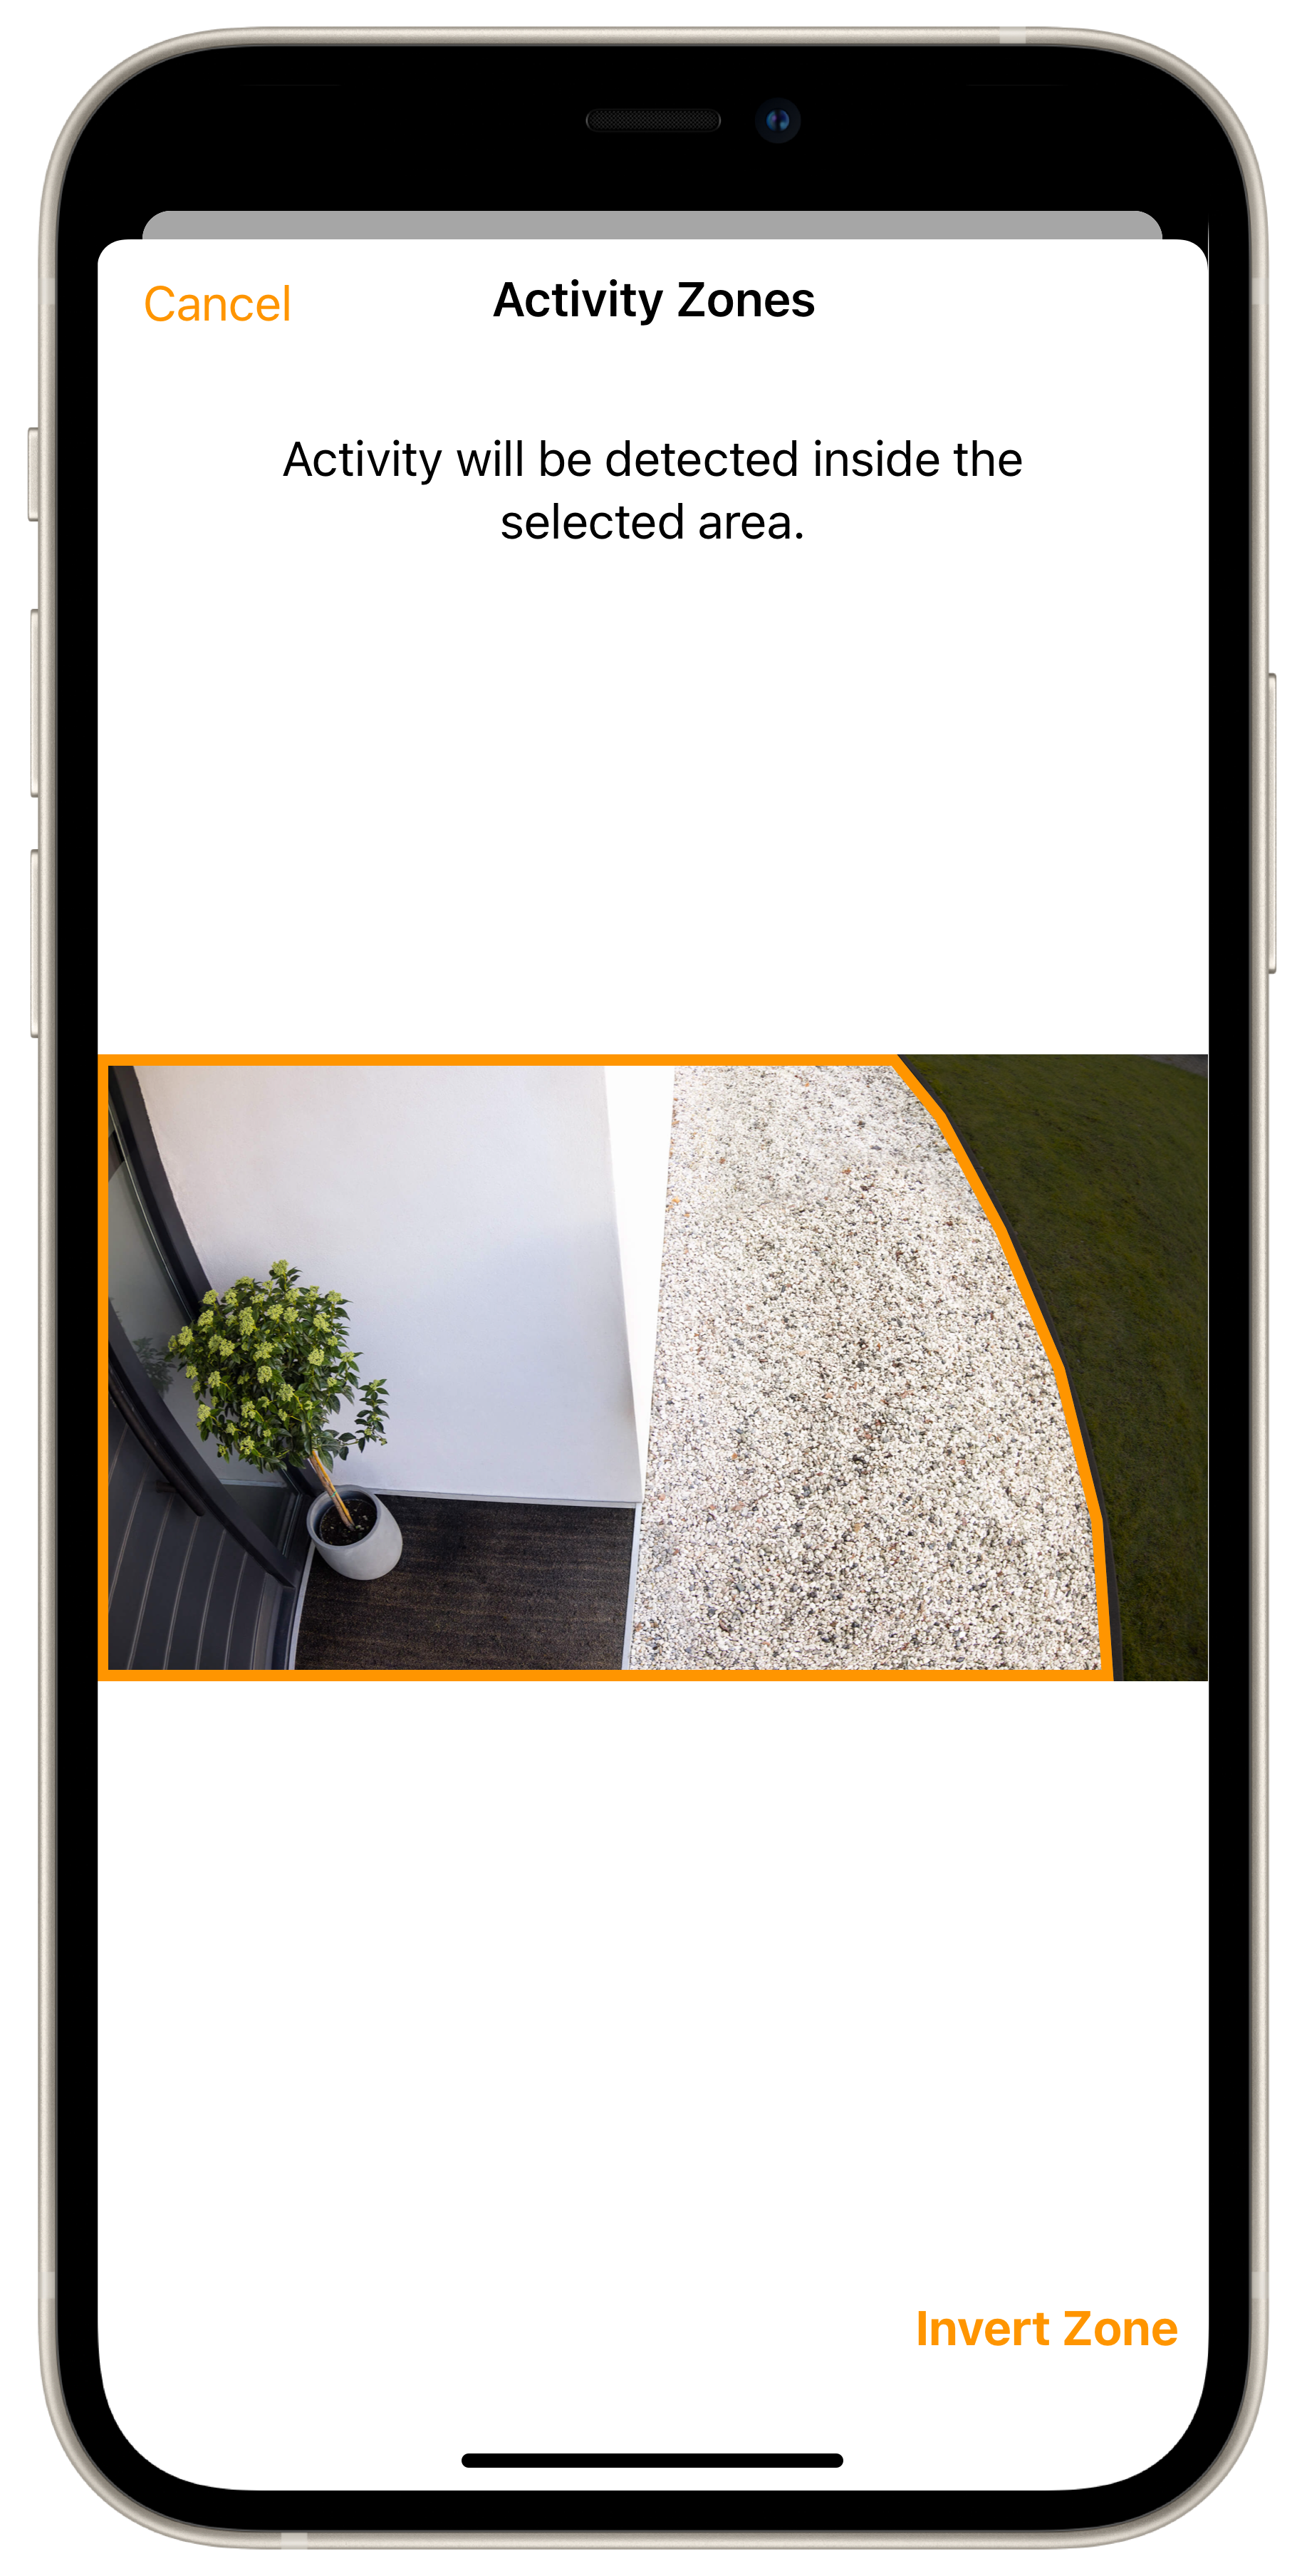
The Activity Zones feature helps optimise the relevance of notifications about detected motion. In just a few taps, you can define one or more areas you want your home hub to focus on when recognising an image once the motion sensor has been triggered. Depending on what is easier to isolate, you can also define the irrelevant zone and then invert it. 


Tip: regardless of whether and where you create an activity zone – Eve Outdoor Cam will continue to record the entire captured image. The activity zone is merely excluded from the AI analysis. This means activity zones are not a way of "hiding" parts of public space from monitoring. 

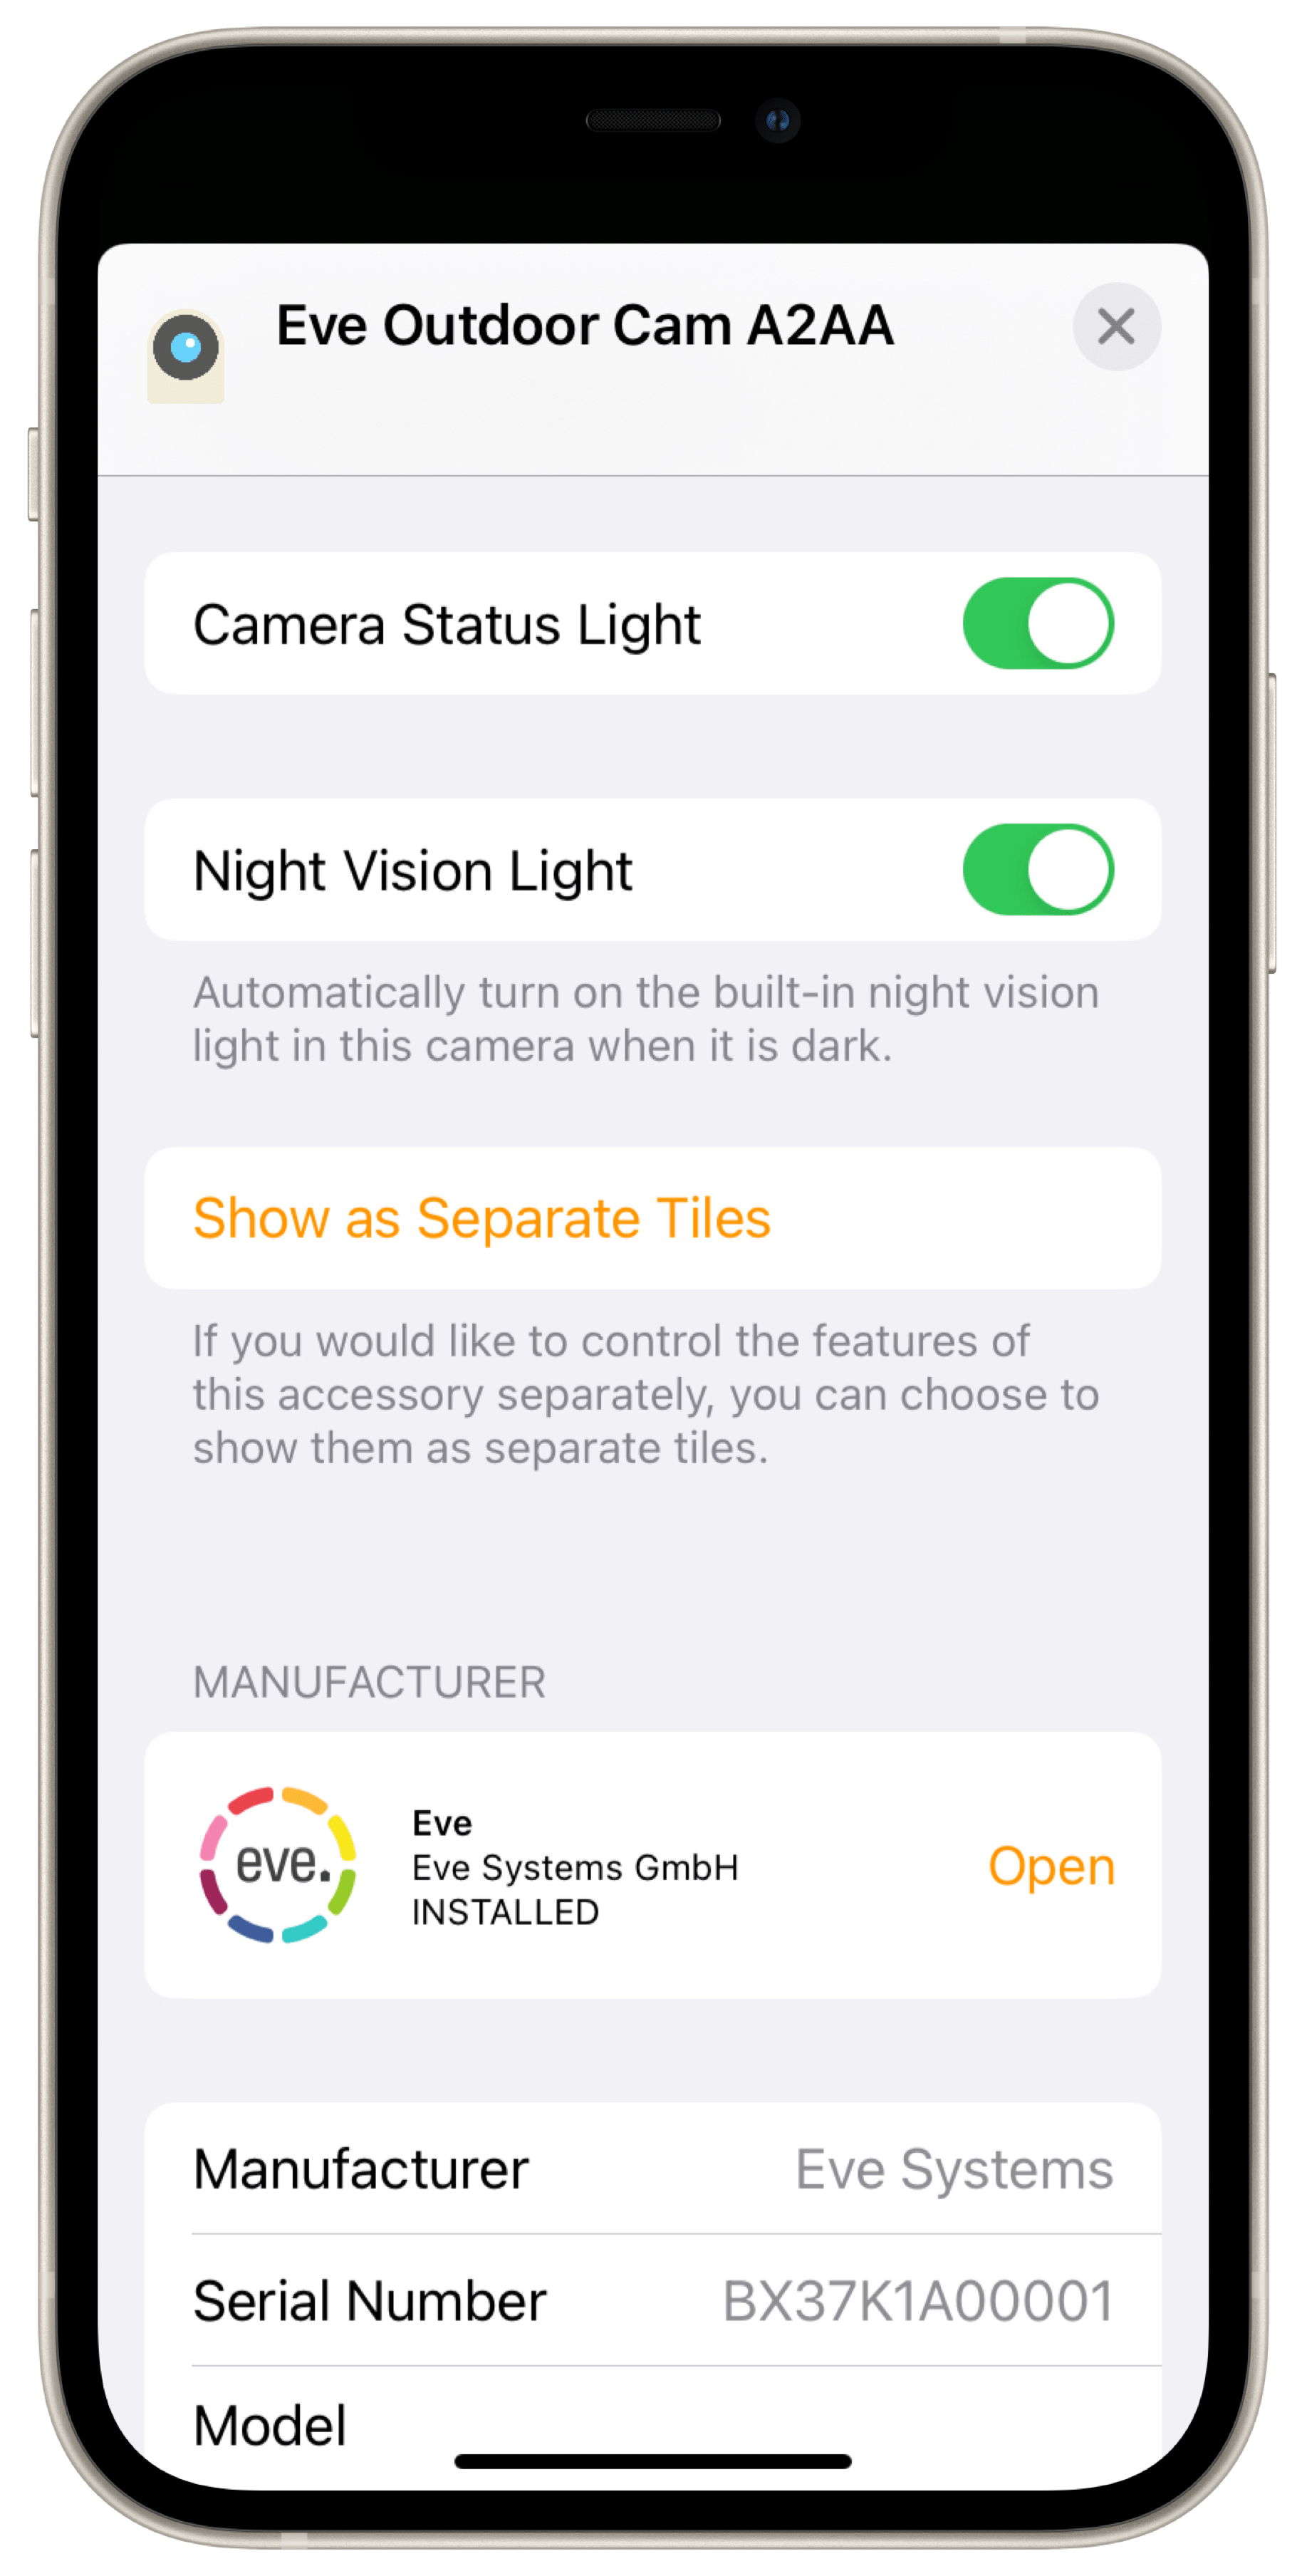
The last two options concern status LED and night vision illumination. If you disable the status light, nobody in the room will be able to tell what the status of the camera is. They also won't know if they're being filmed. Likewise, you can also disable the night vision lighting from turning on automatically when it gets dark. Tip: this setting has no effect on motion detection, which also works in complete darkness.


Tip: if you want to configure who can access the recordings, in the Home app tap the home icon on the top left then go to Home Settings... > Home Name > People. Now tap the entry for the person and then in the "Allow Access to Cameras" section choose between the options "Stream only" and "Streaming & Recording".

Live screen and recordings

HomeKit Secure Video stores recordings in encrypted form and they can only be played back on an authorised device or player. If there are recordings in the ten-day storage, Home displays a timeline with thumbnails on the live screen. If you tap on it, a calendar also appears, which you can use to quickly call up the activities of a specific day. Tapping on "Live" hides the calendar again. Home enriches the recording thumbnails with icons that show you at a glance what type of activity (people, animals, etc.) was captured.


If Eve Outdoor Cam has recorded people, Home even shows their names – provided the facial recognition was active and successful. You can share a tap-selected recording via the corresponding icon displayed on the left above the timeline. The usual options are available – whether AirDrop, the photos and messaging apps or the linked storage locations. Tip: Home provides shared recordings as unencrypted .mp4 files. This way they're playable outside of your HomeKit Secure Video infrastructure and that of your invited fellow users.  
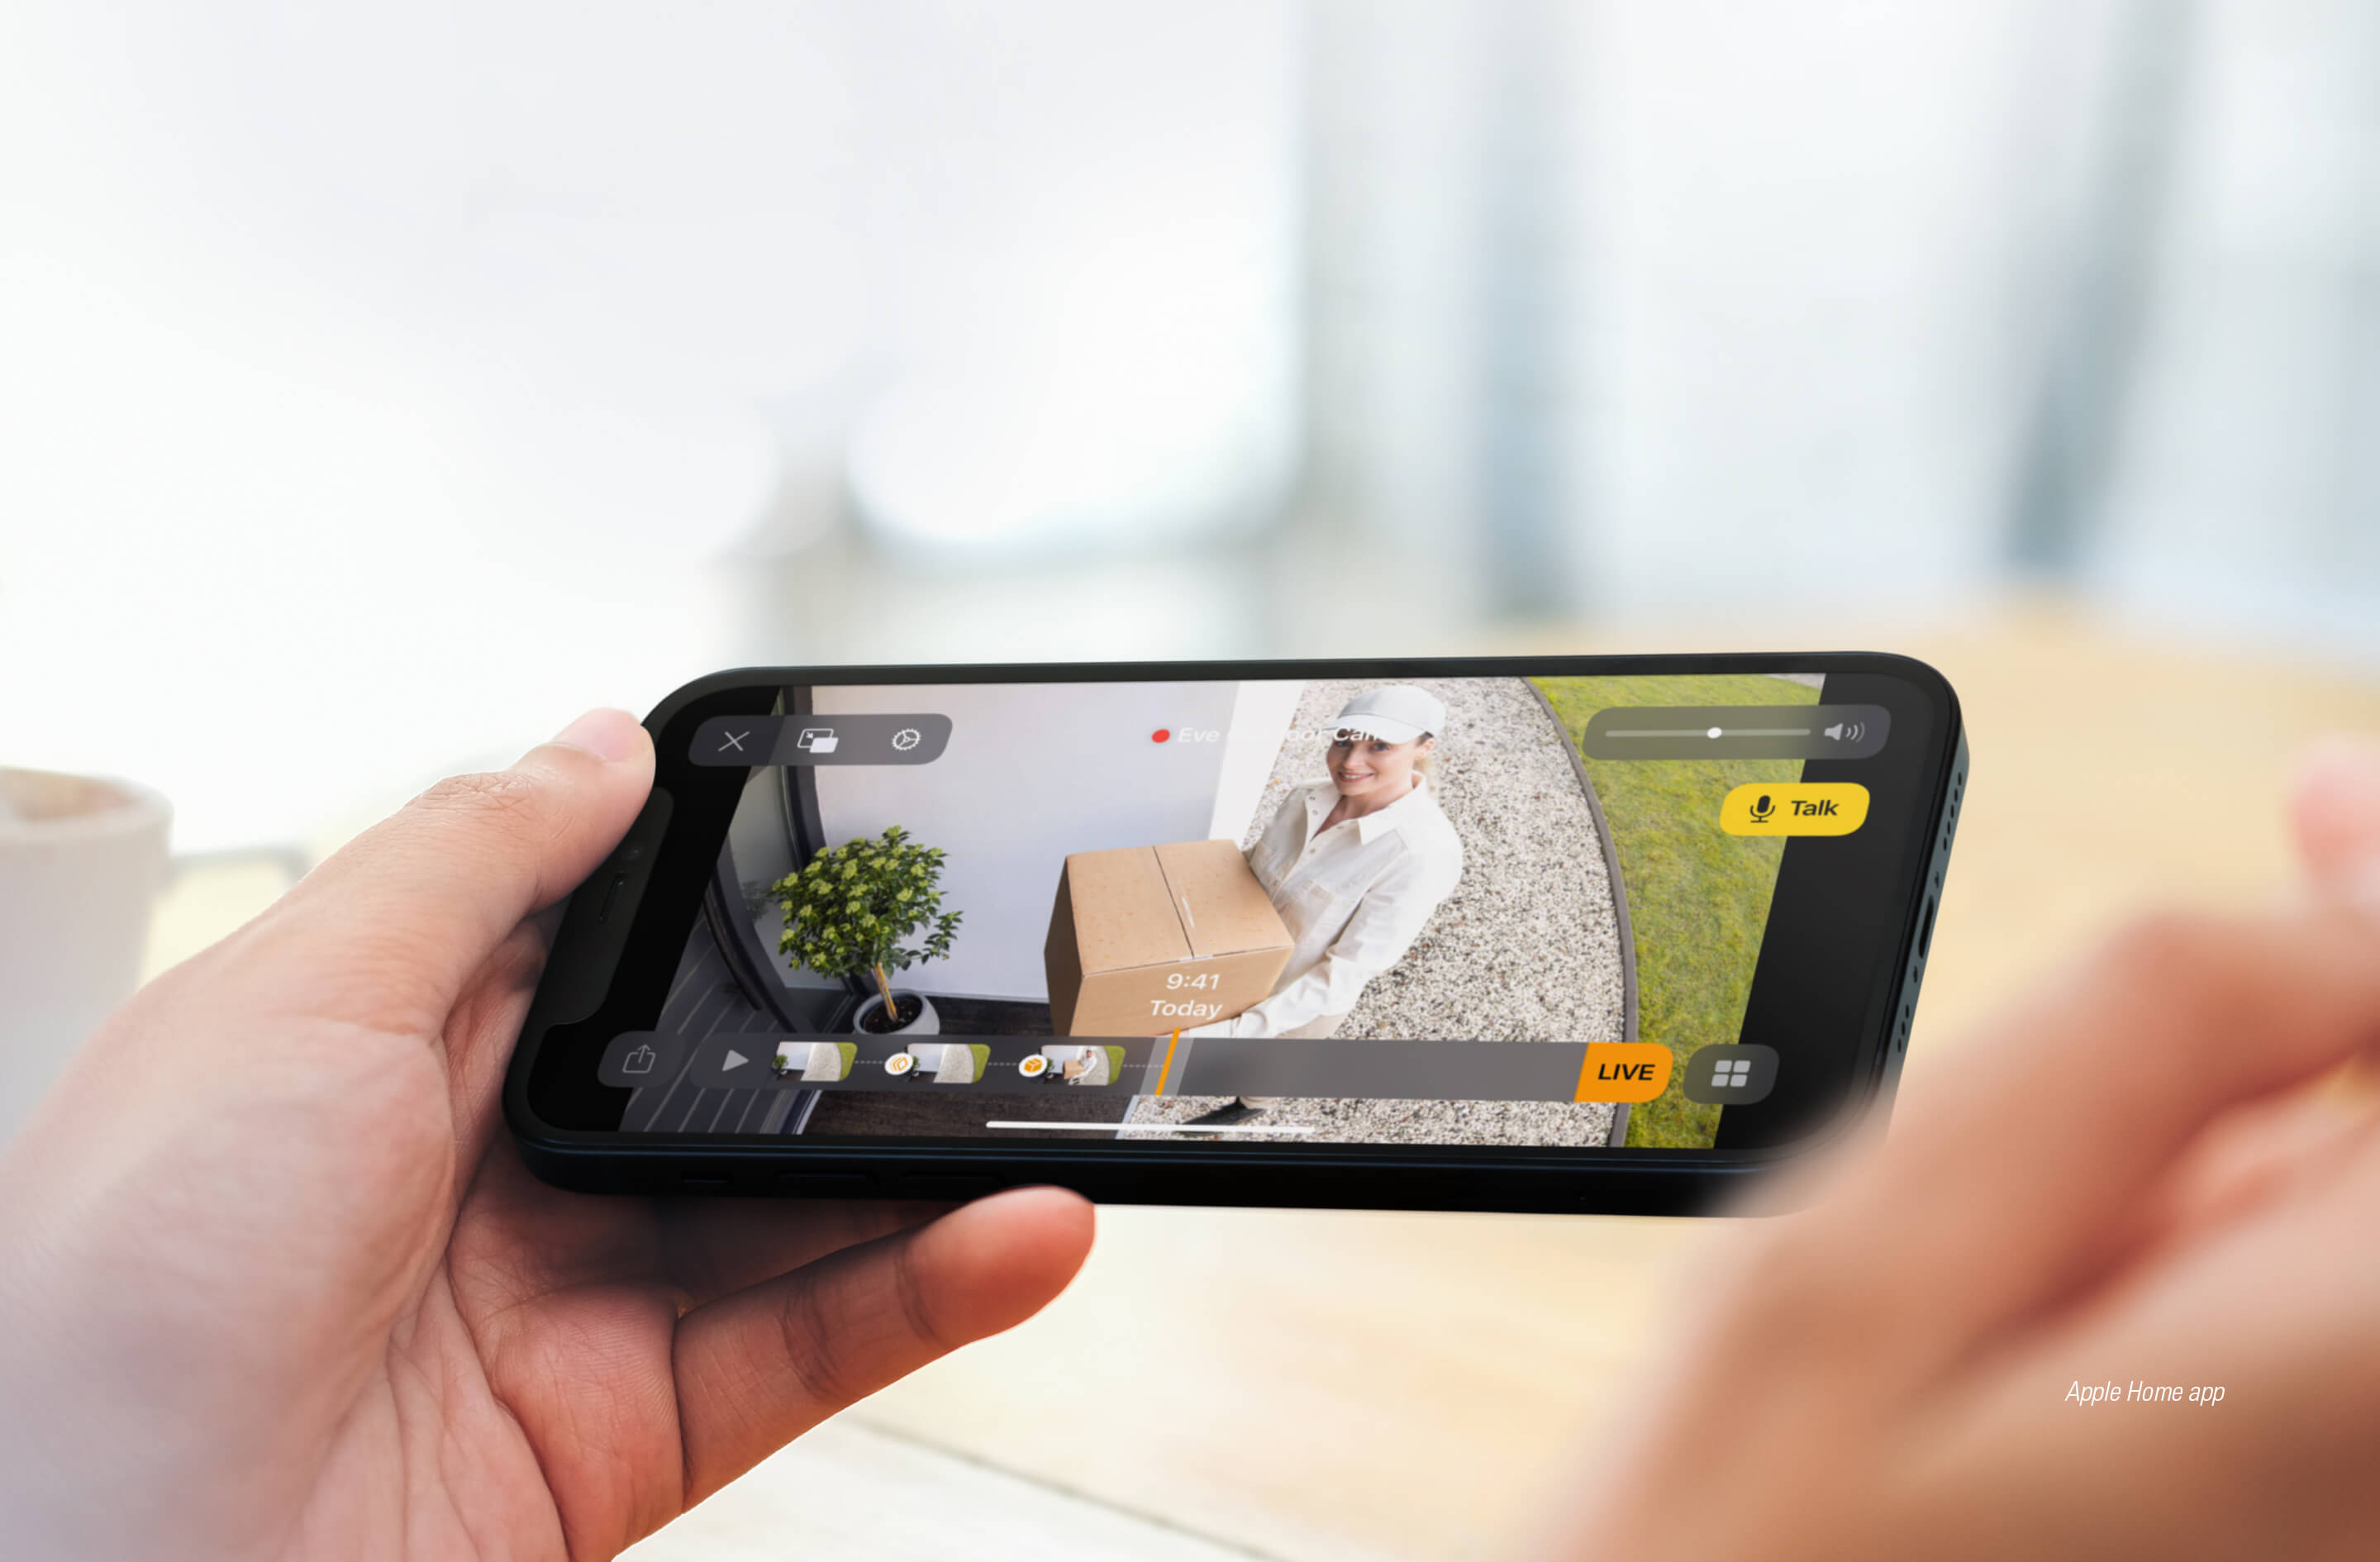
Other live screen controls include the picture-in-picture button that floats the video in the foreground, the buttons for settings, for adjusting the volume of the camera microphone, for controlling nearby devices, and for sending a voice message (tap and tap again to activate and deactivate the microphone). 

Tip: your Apple TV can also be used as a player for cameras with HomeKit Secure Video. More details at: https://support.apple.com/de-de/guide/icloud/mm7c90d21583/icloud


Additional features and settings

While the Home app manages the features provided by HomeKit Secure Video, the Eve app, in conjunction with Eve Outdoor Cam, is great at accessing and controlling the individual hardware components, i.e. video, floodlight and motion sensor.

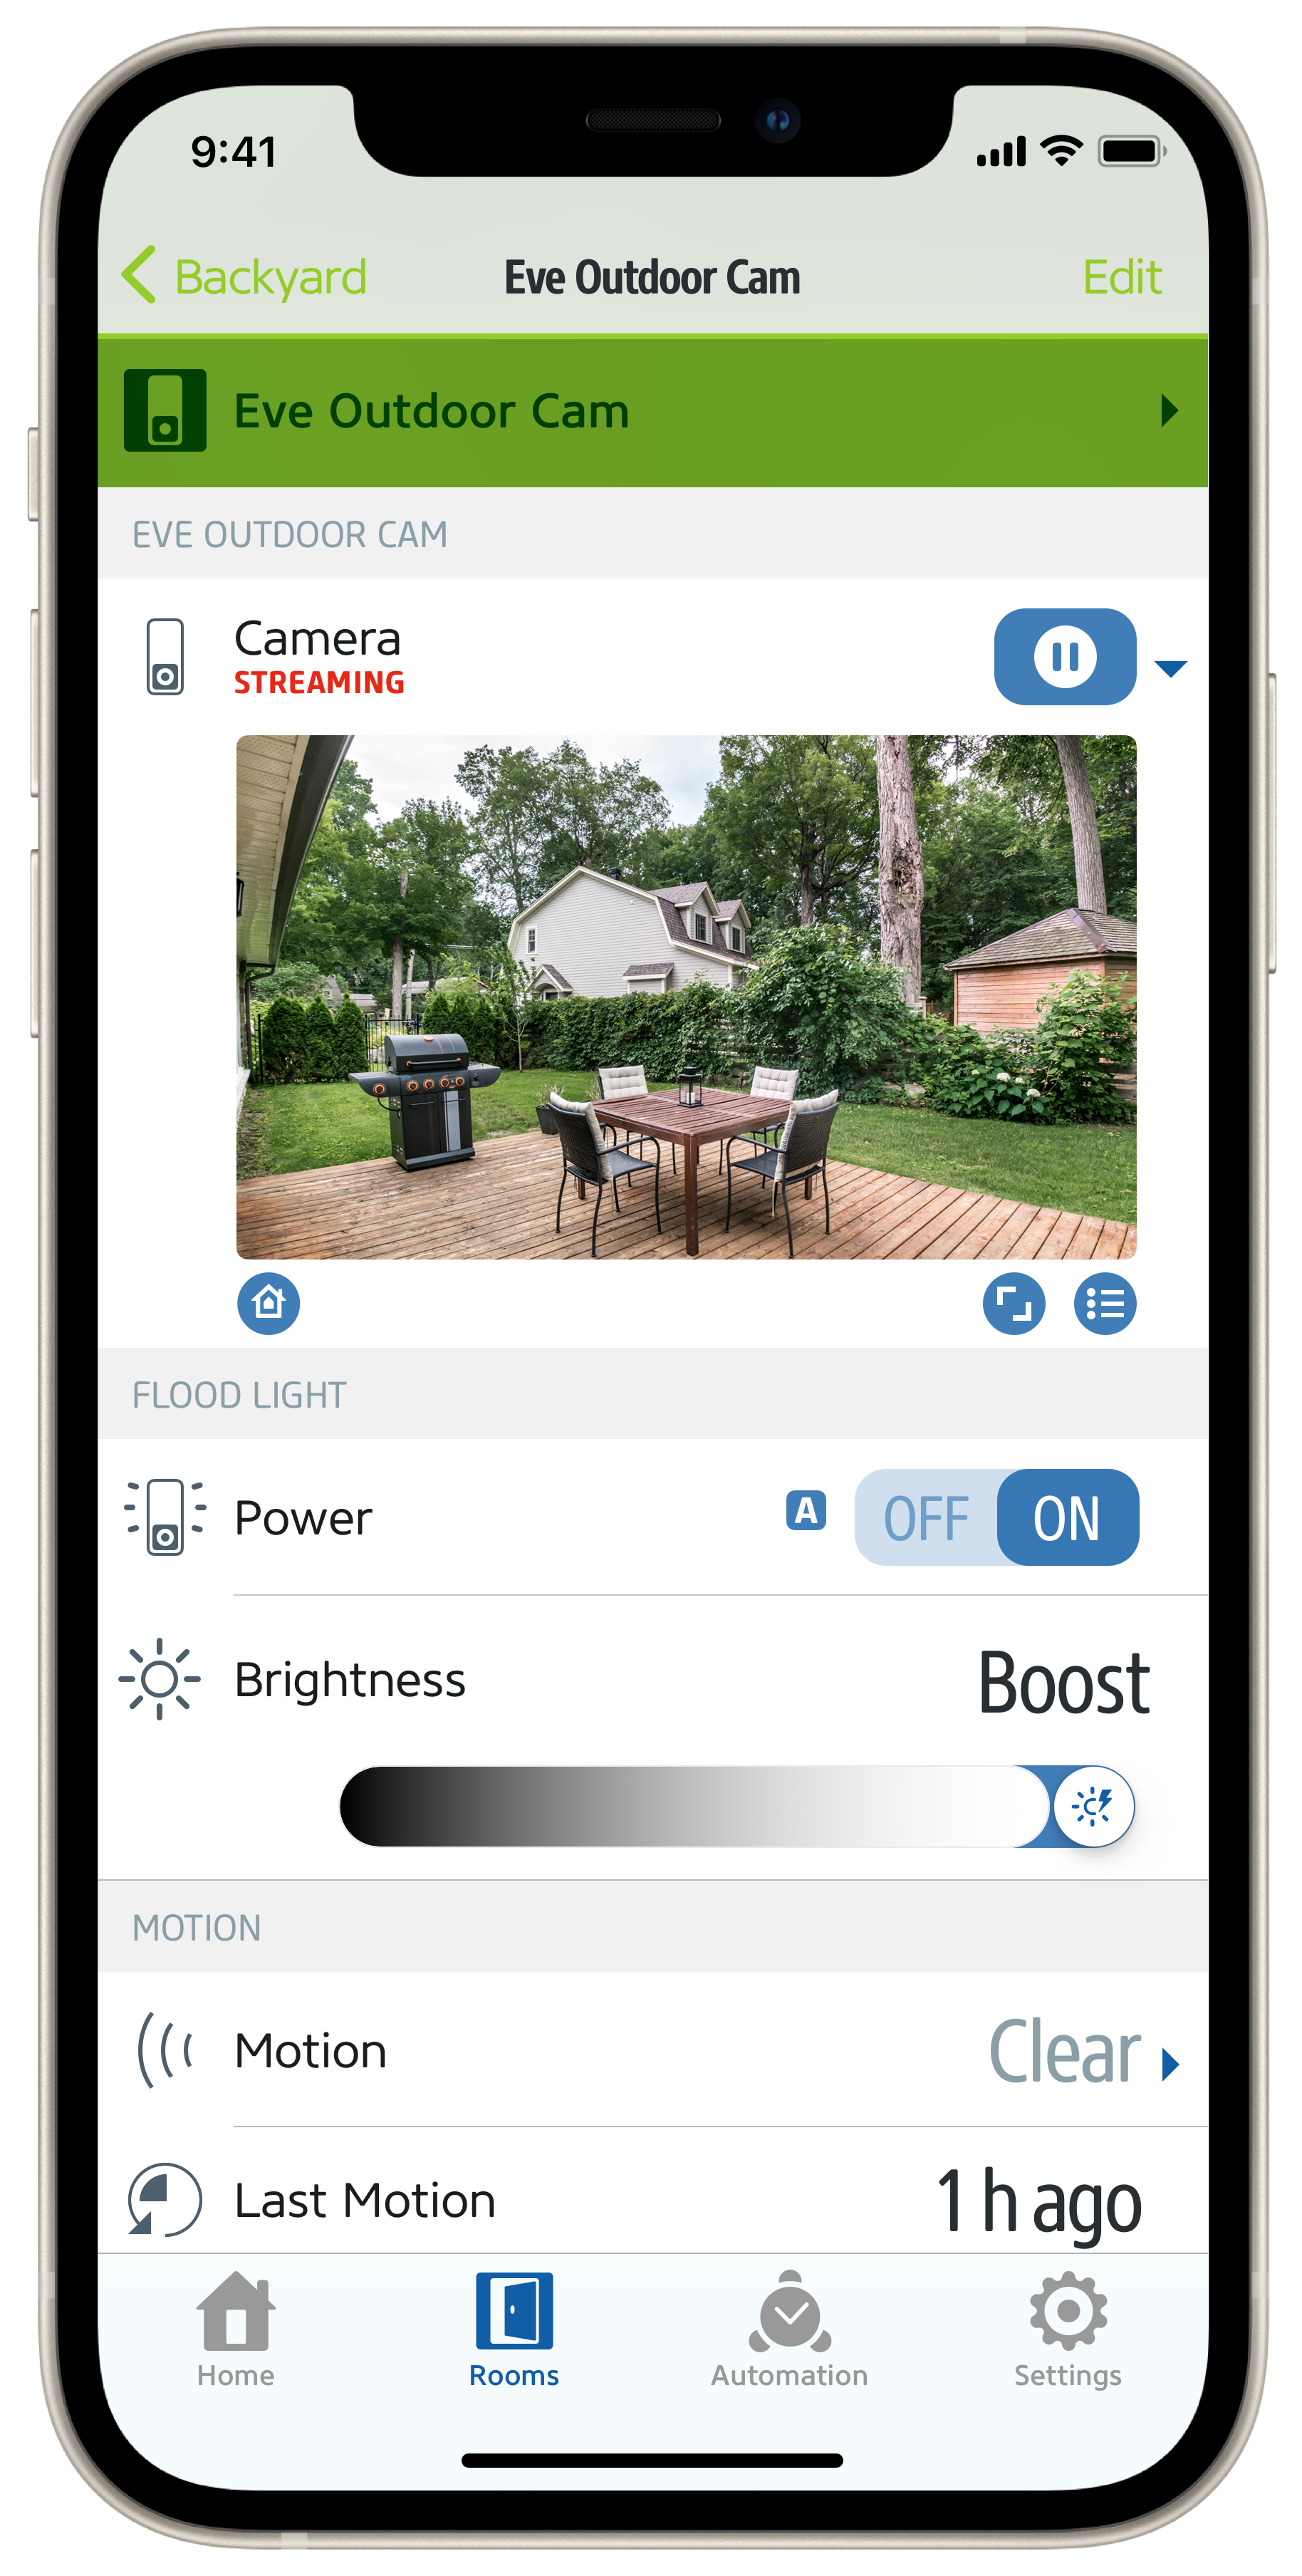
Eve displays the infrared sensor and floodlight as independent devices in Eve Outdoor Cam' detailed view. The floodlight can be switched on and off and its brightness can be adjusted up to the boost function (caution: do not look into the light when it is activated). Eve displays the currently set automatic mode of the Motion Light via a corresponding icon next to the ON/OFF switch. Just like the camera’s companion product Eve Motion, the motion sensor displays detected motion on a timeline, reports the current status (Motion or Clear) and the time elapsed since motion was last detected. 


Tip: in the room view, icons below the name of your Eve Outdoor Cam show the status of the individual components, i.e. whether motion has just been detected, what status the LED shows, whether the floodlight is active and how the Motion Light is configured. 
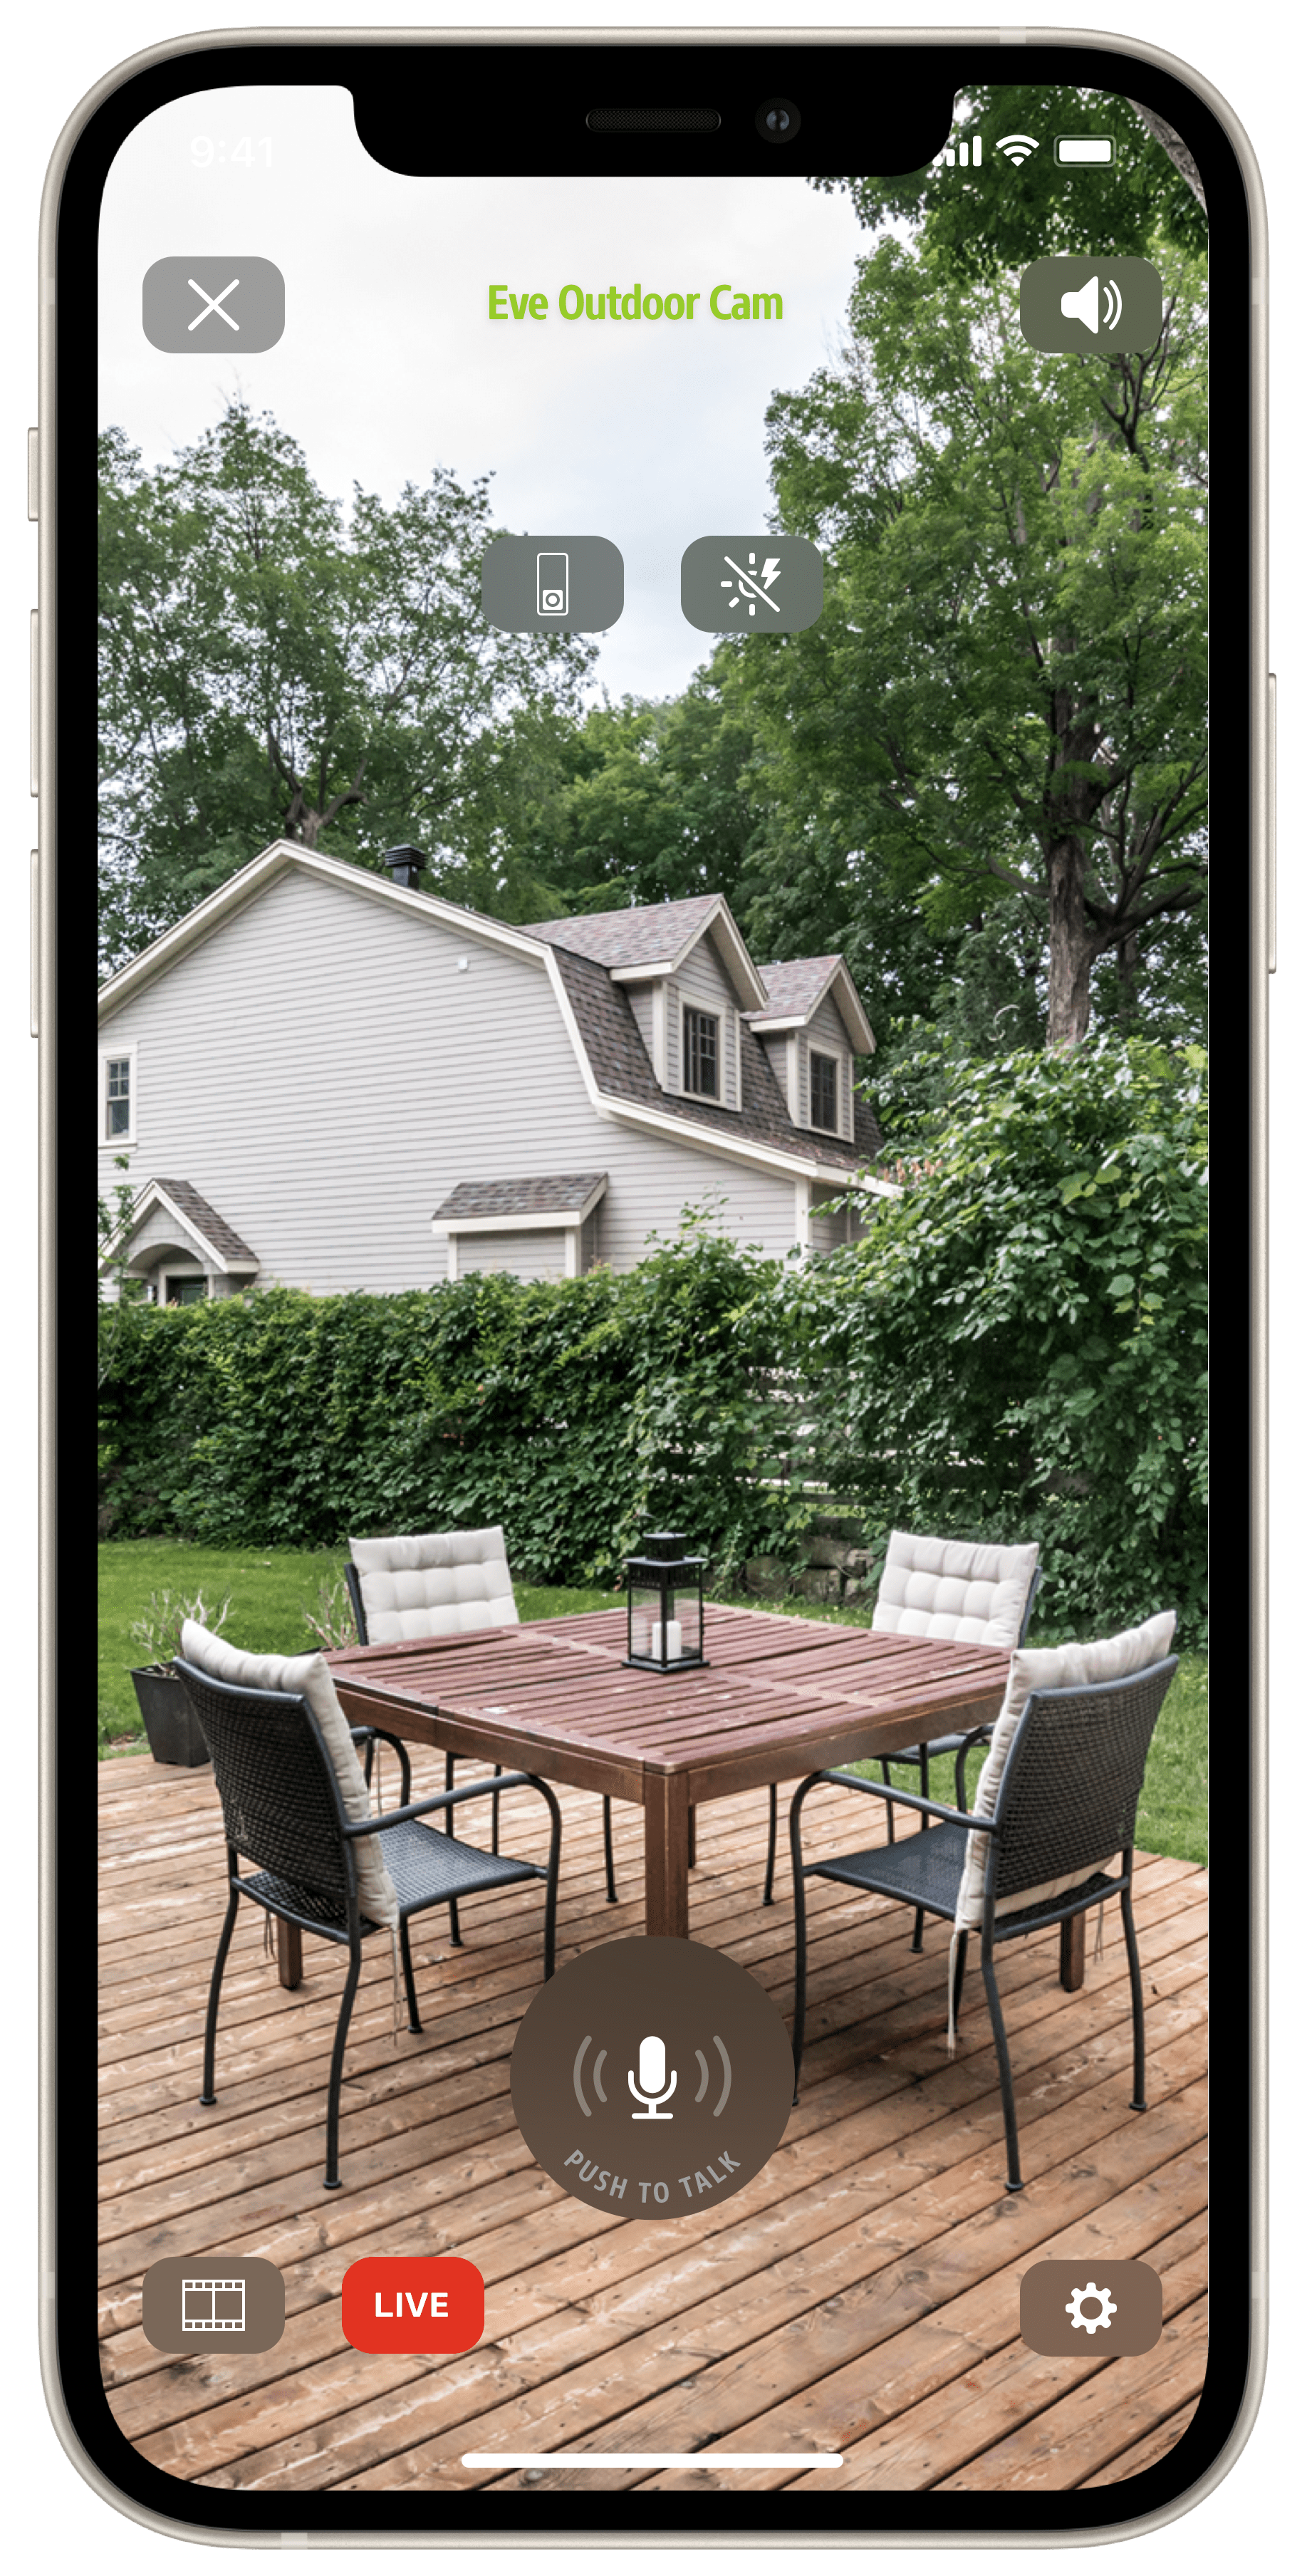
A double tap in the stream or snapshot window of the detailed view opens the live screen with the Eve exclusive push-to-talk feature. If you press and hold the microphone button, the microphone on your iPhone will be activated and the camera speaker will be turned on. Let the button go, and the iPhone microphone and camera speaker will be muted, allowing the person you can see to respond.


The gear icon lets you adjust the level of the camera speaker and microphone, the movie icon takes you quickly to the Home app and your camera recordings. Buttons for floodlight and boost help to illuminate the situation in front of the camera brightly or extremely brightly.
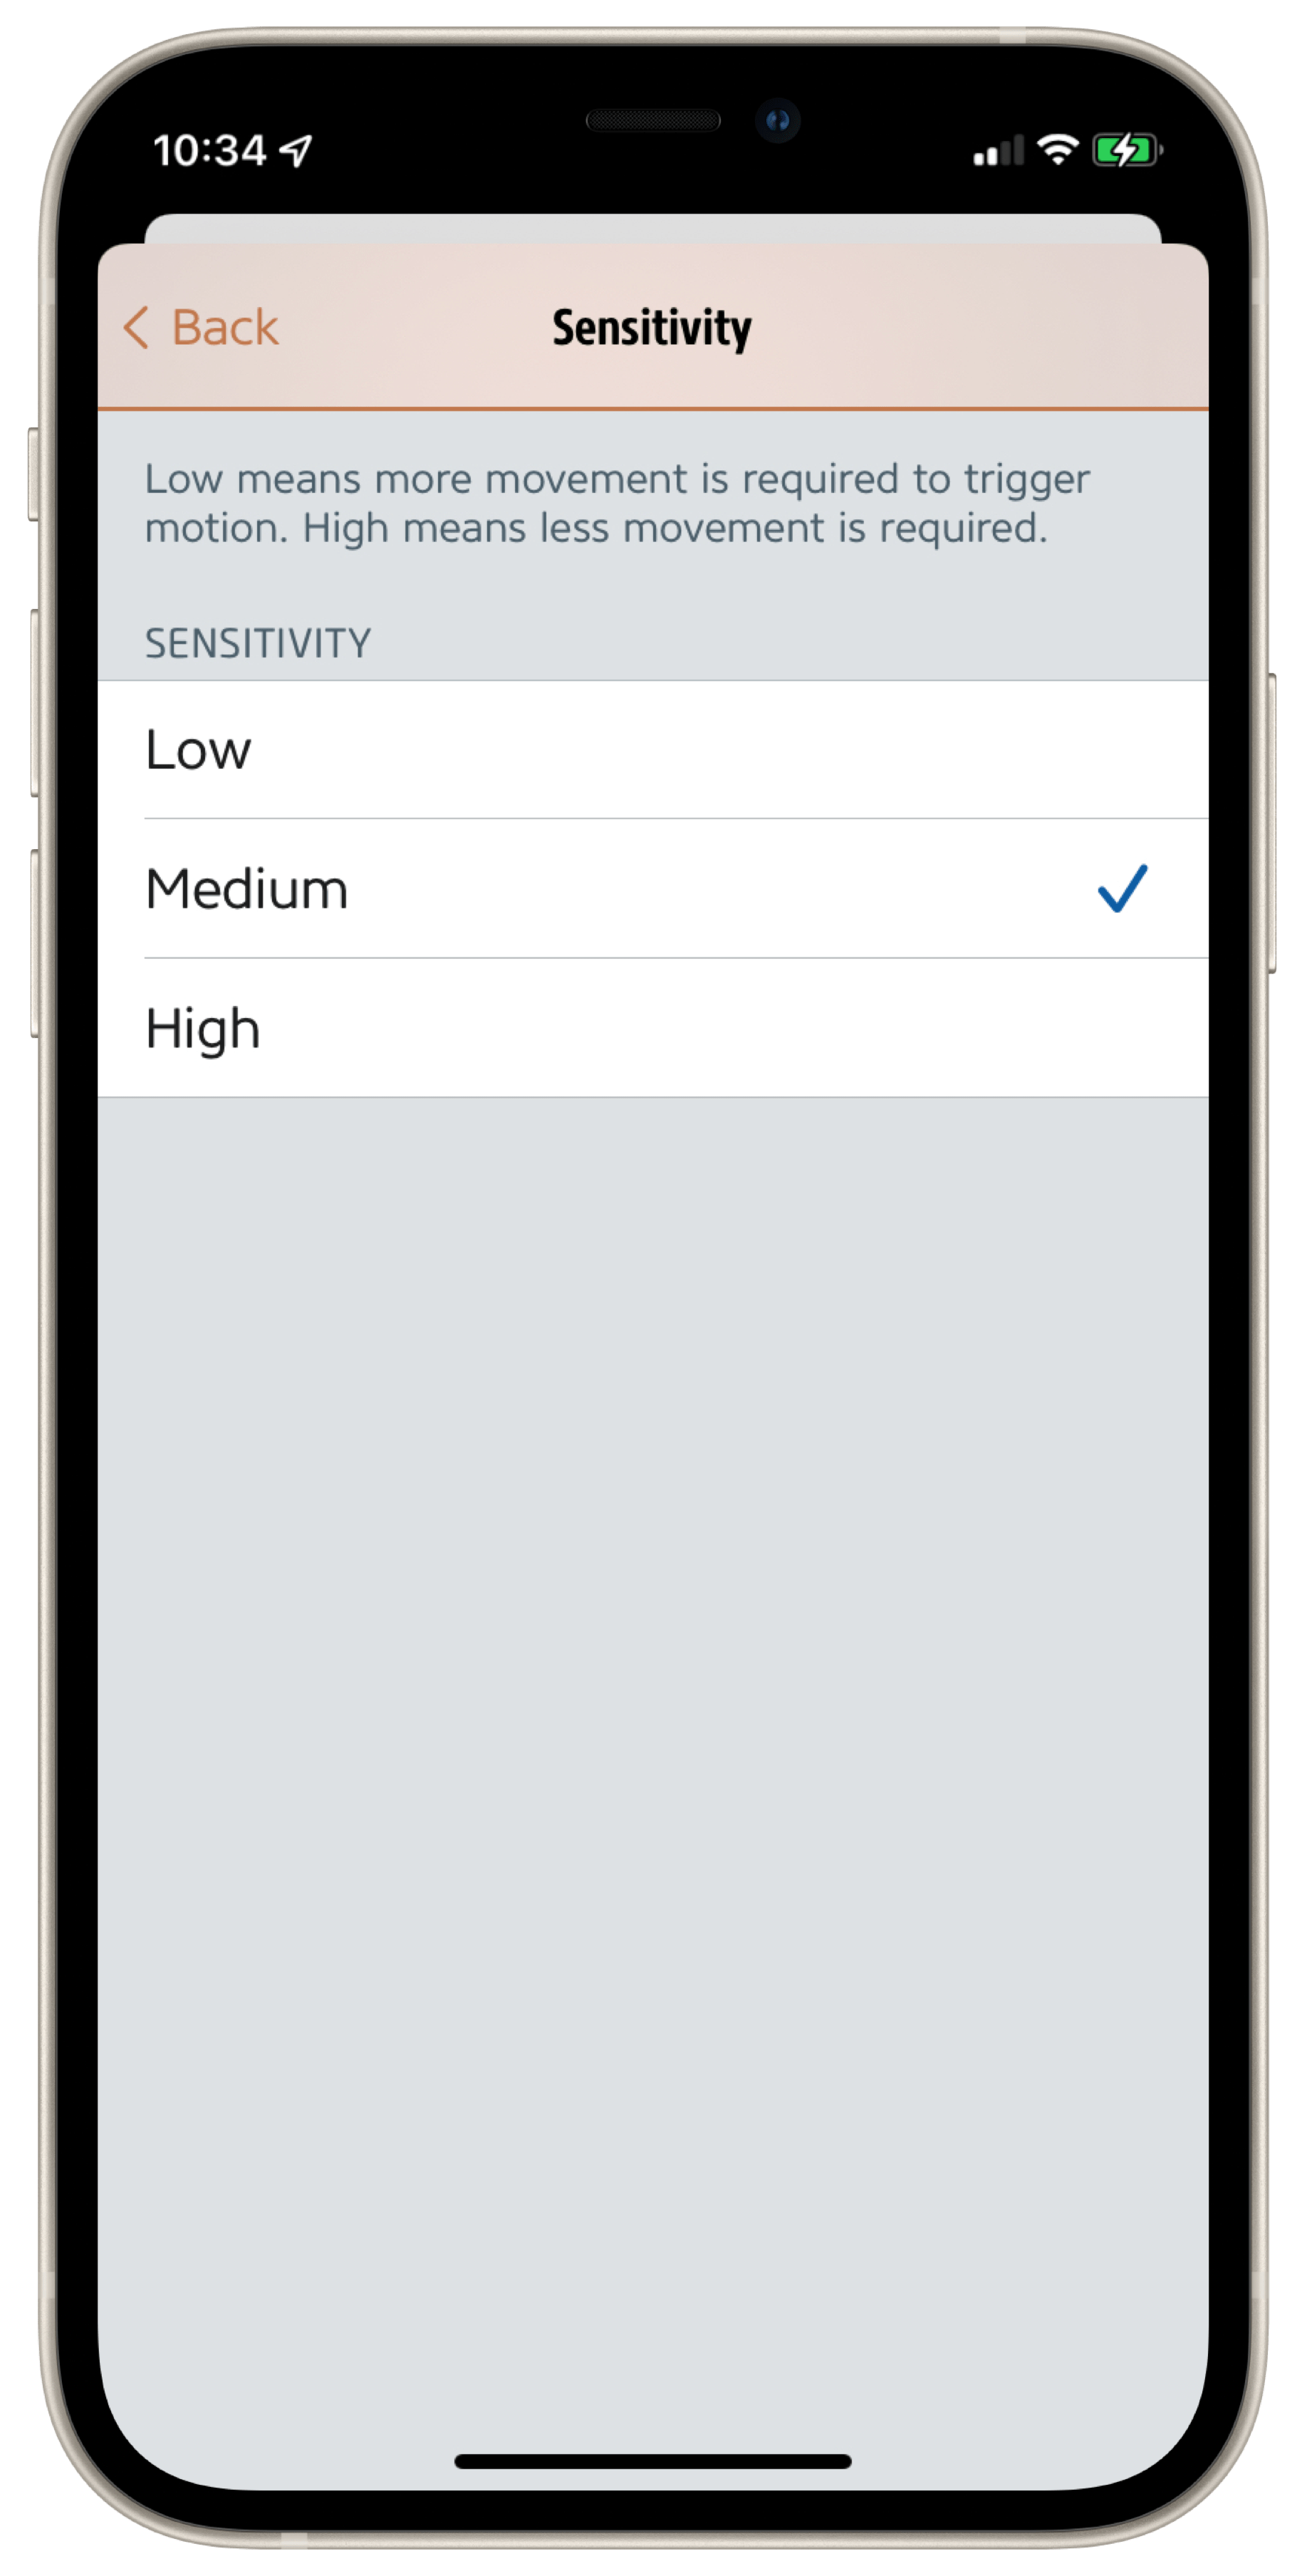
In Eve > Settings > [Eve Outdoor Cam], customize the behaviour of your camera to suit your needs. Select a sensitivity level for the motion sensor that is appropriate for the location and, if necessary, readjust after a few days if notifications seem to be missing for relevant events or too much unimportant content is reported.


The duration of the motion is especially important for automations, where e.g. switching from active to inactive triggers a scene. If set accordingly, it can also determine the number and frequency of notifications if the detected event lasts longer, such as children playing ball in the driveway. 
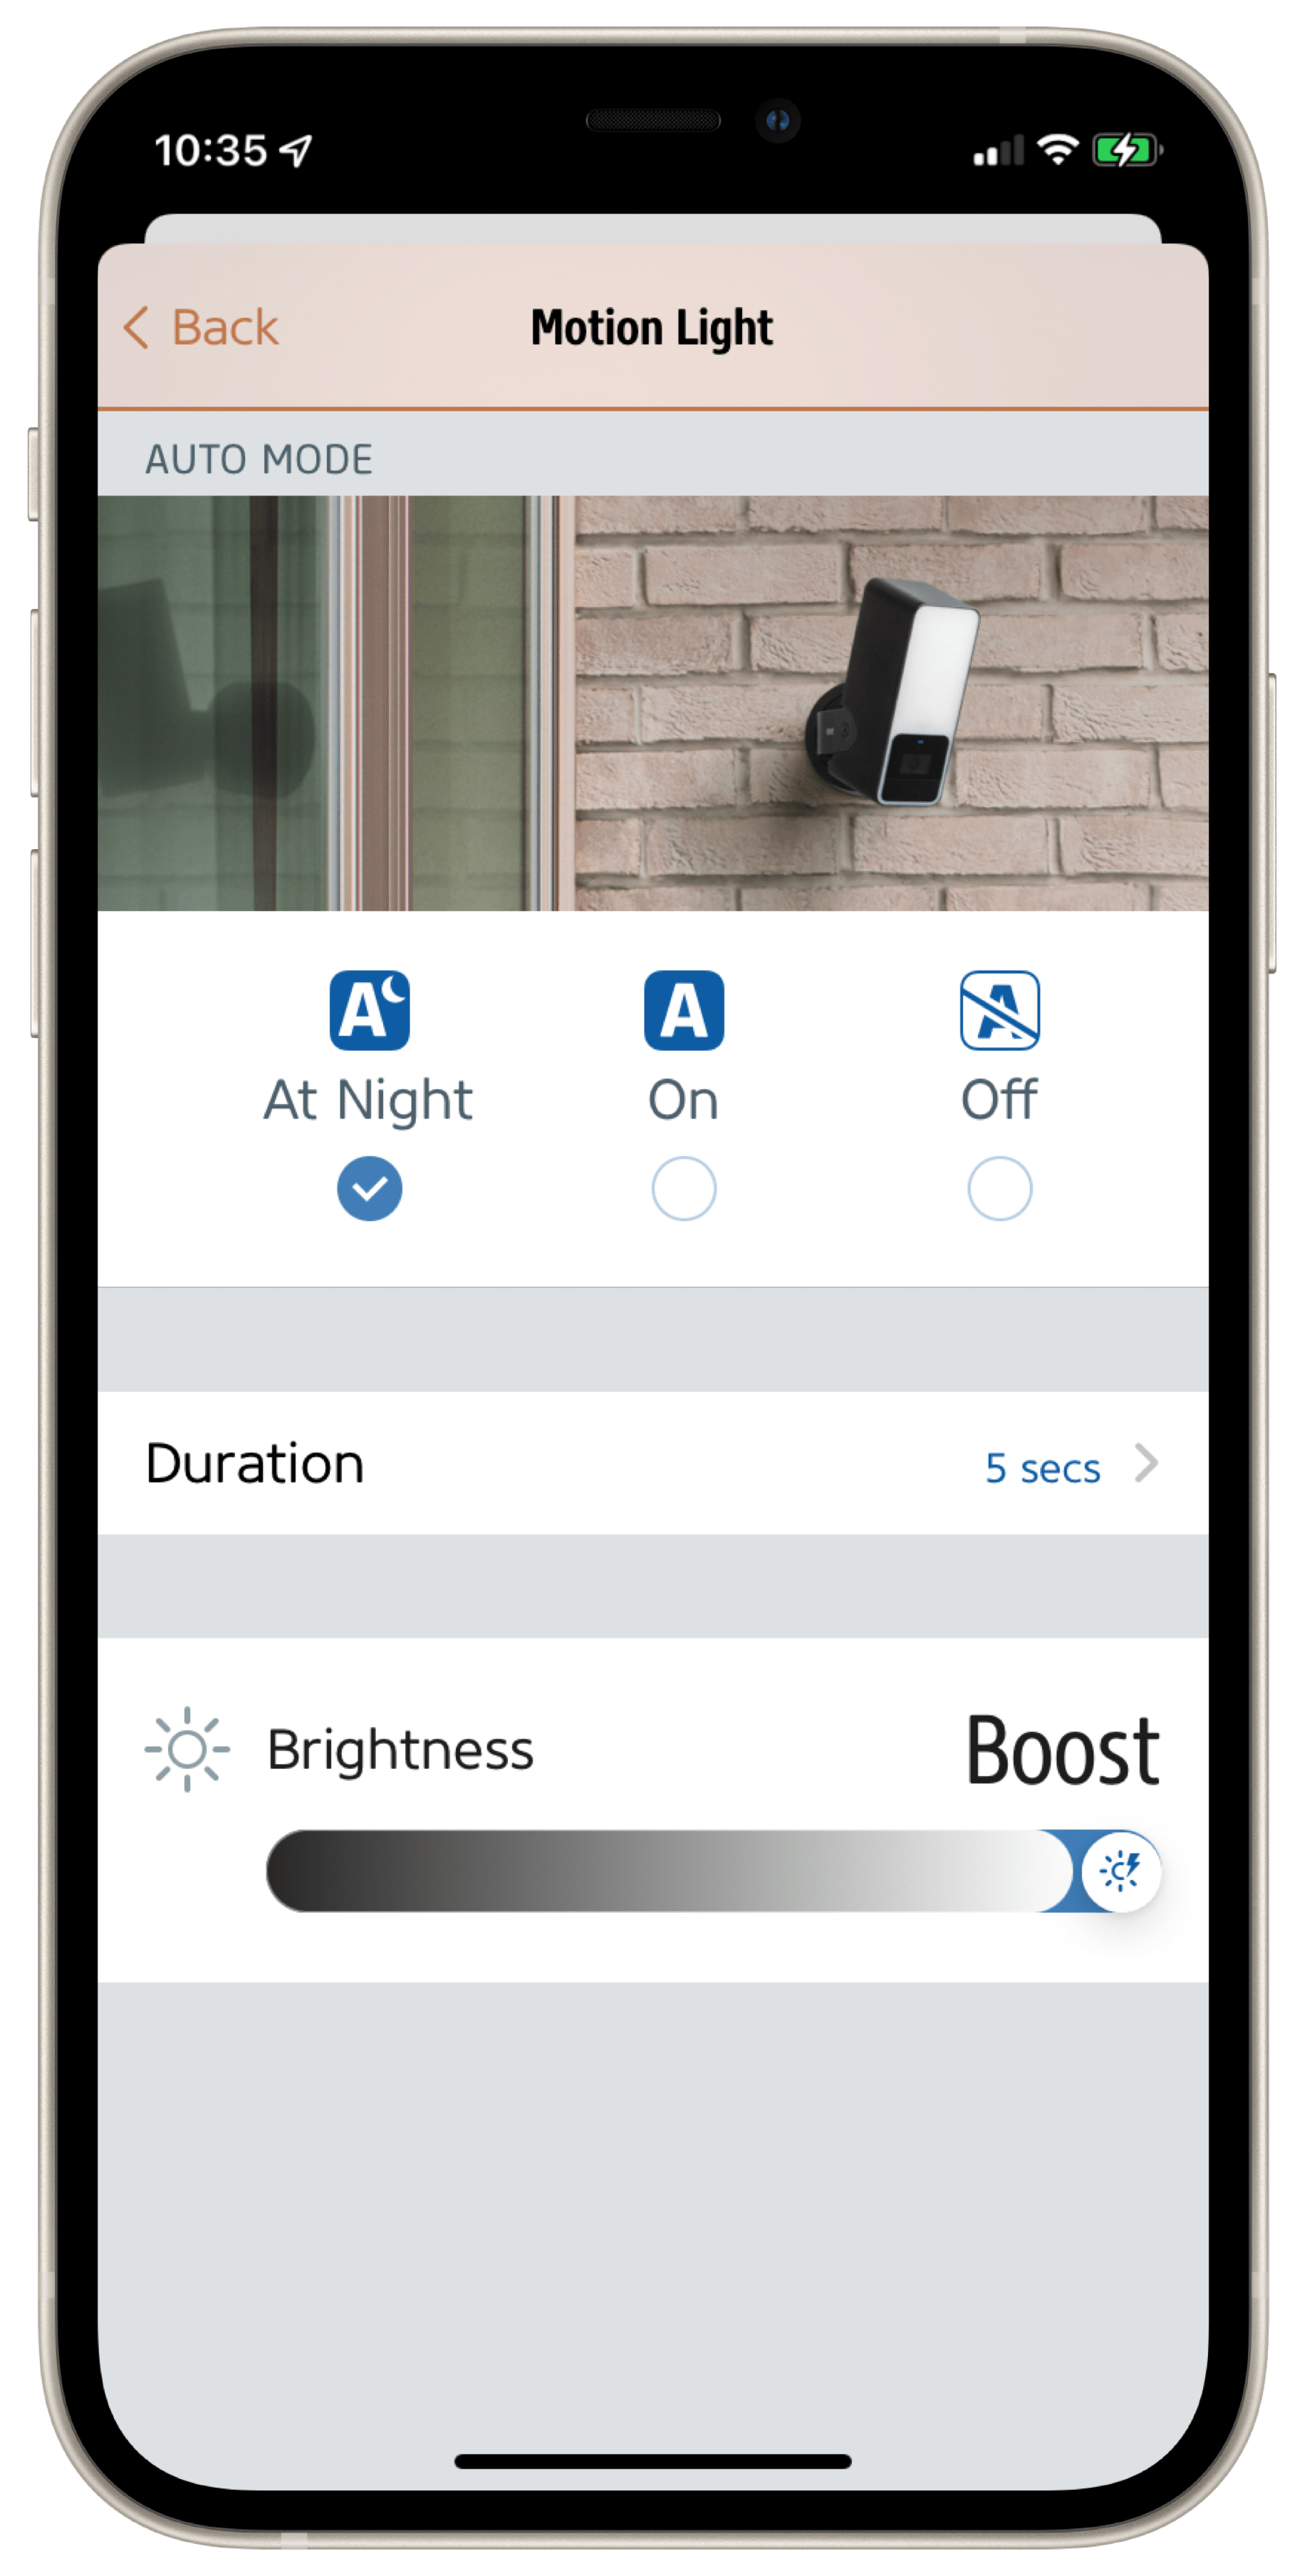
As the front line of defense, Motion Light is an elementary security feature of Eve Outdoor Cam. It is based on autonomous automation running on the device, so it works independently of HomeKit and the Wi-Fi or Internet connection. This way, the Motion Light also responds to any movement, even if HomeKit Secure Video notifications or recordings are only for specific originators.


It does, however, take into account the motion sensor's sensitivity setting, and in Eve > Settings > Eve Outdoor Cam > Motion Light, you can adjust the brightness at which you want your floodlight to illuminate activity – all the way up to Boost.  Select Auto Mode > Night to include the ambient light sensor and illuminate the field of view only when it's dark. The Duration setting determines if and how long the floodlight should remain active beyond the general duration of detected motion.
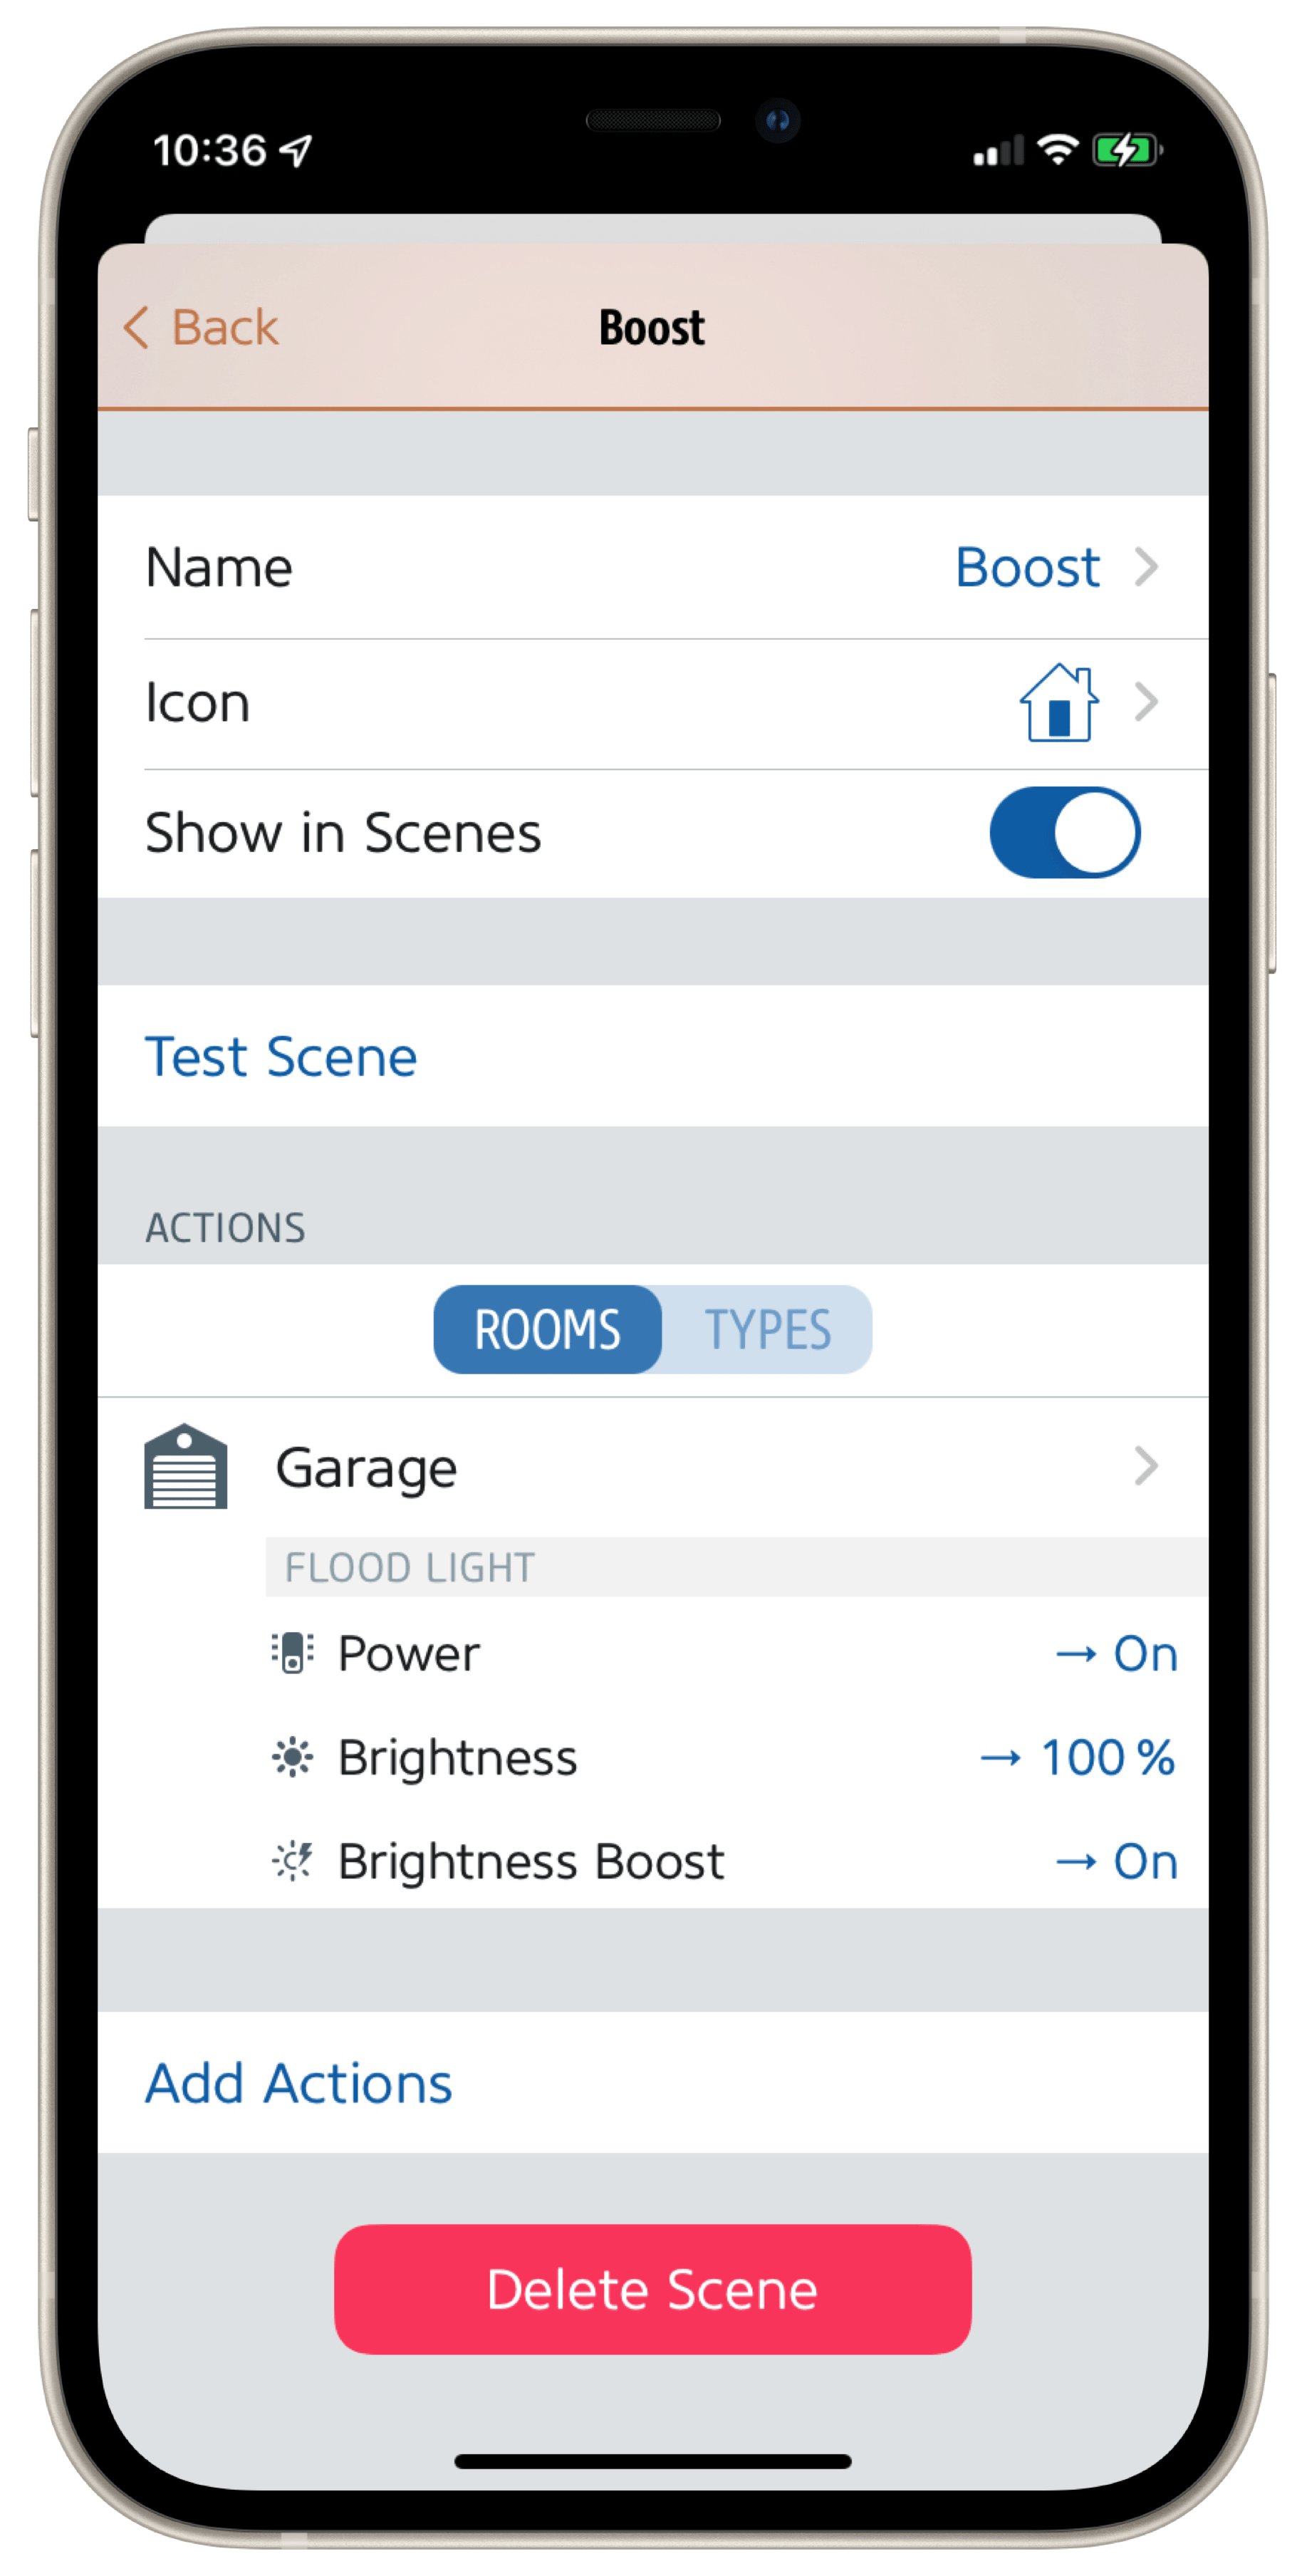
HomeKit is not aware of your floodlight's brightness boost, but the Eve app lets you create scenes with this powerful function. This makes it possible, for example, to connect additional motion sensors and thus areas outside the area monitored by Eve Outdoor Cam. Someone's approaching the back of the garden shed? On comes the floodlight, and with a Boost!


Please note: the brightness boost causes increased heat generation in the passively cooled housing and therefore switches off again after 20 seconds. However, you can reactivate it after a few seconds of cool-down time. 
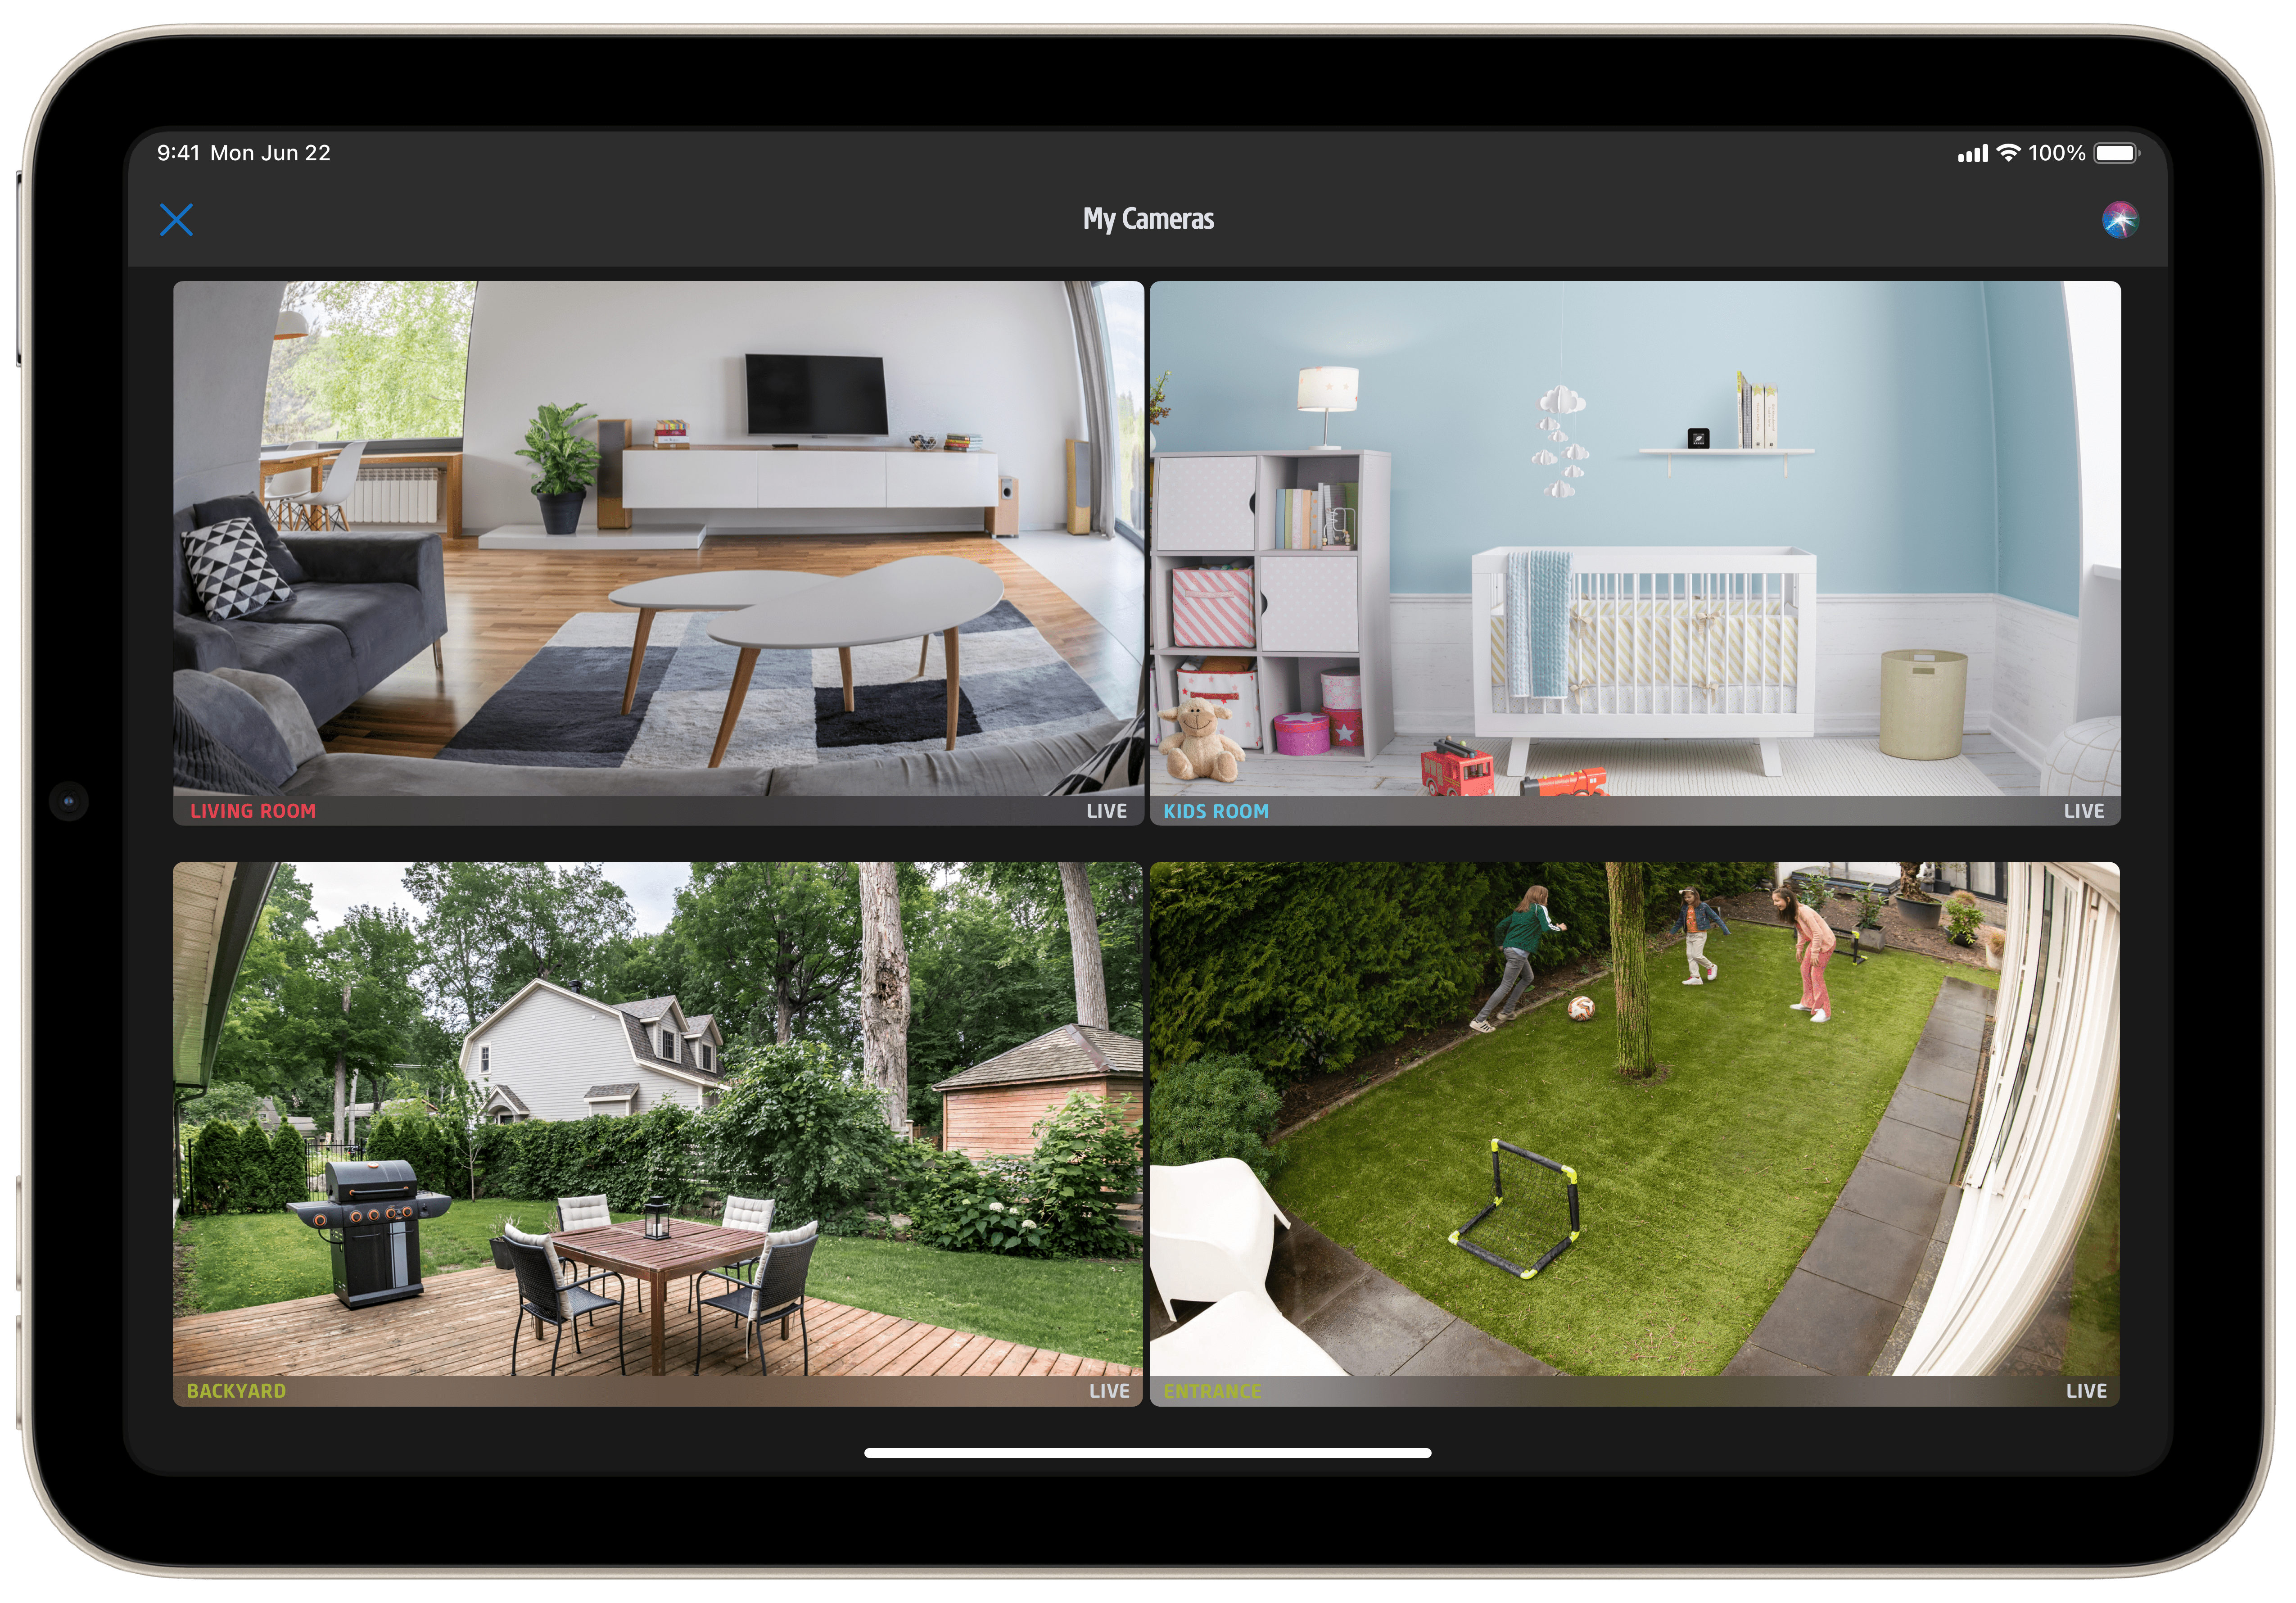
The Eve app offers a really handy function, which is great if you own several cameras. As soon as more than one HomeKit-compatible camera – regardless of manufacturer – is installed, Eve automatically expands the "At a glance" view to include a new "My cameras" tile in which all devices or their live images are displayed in groups.


Tip: tap the small list icon below the stream or snapshot window of the detailed view and you will see a log of the status events for your Eve Outdoor Cam – in other words, all the times the camera has been switched between armed/disarmed.

Troubleshooting

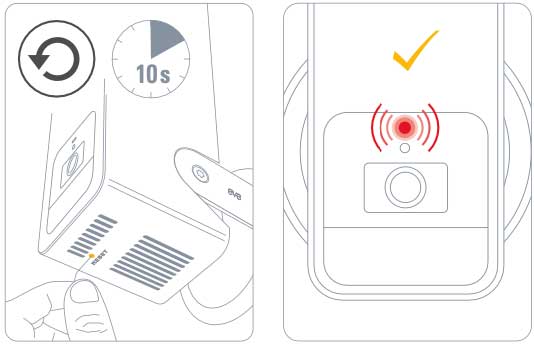
The reset button on the underside of the camera housing is easily accessible by means of a bent paper clip. It allows the camera's WLAN settings to be reset or the factory settings to be restored if the network SSID and/or password are changed.


To perform a Wi-Fi reset, push and hold the reset button on the bottom of the camera with a paper clip for 5 seconds until the LED starts blinking blue. Release the reset button as soon as the LED starts blinking blue and open the Home app to add Eve Outdoor Cam to the Wi-Fi network your iPhone is currently connected to. Factory reset: to reset all settings of Eve Outdoor Cam, including the HomeKit pairing, push and hold the reset button on the bottom of the camera with a paper clip for 10 seconds until the LED starts blinking red.
All FAQs

Eve Outdoor Cam
Secure Floodlight Camera
Learn more

Requires iPhone or iPad with the latest version of iOS/iPadOS, HomePod or Apple TV (4th generation or later) as a home hub, Wi-Fi network (2,4 GHz 802.11b/g/n)
 
Add to cart
Your choice
Add to cart
incl. VAT, plus shipping
Your choice
Eve Cam
Secure Indoor Camera
Learn more

Requires iPhone or iPad with the latest version of iOS/iPadOS, HomePod or Apple TV (4th generation or later) as a home hub, Wi-Fi network (2,4 GHz 802.11b/g/n)

 
Add to cart
Your choice
Add to cart
incl. VAT, plus shipping
Your choice
136 Comments
Hallo Alex! Zur Rückkopplung kommt es nur bei räumlicher Nähe von iPhone und Eve Outdoor Cam. Viele Grüße, Volker
Reply
May 17, 2023
Chris
Hi,
I was wondering if the Eve Outdoor Camera can be configured to switch between modes on the basis of time schedules (eg. At night while sleeping) in addition to its standard Mode changing method using Geofencing (AKA: Home/Away via GPS of each Home user’s iOS device)?


Thanks 🙏🏽


Reply
Apr 7, 2023
Hello Chris! As all cameras with HomeKit Secure Video you can only set different by When home and When away. Best regards, Volker
Reply
Apr 17, 2023
Andy
can the camera be mounted under the sofit like a traditional flood light?
Reply
Mar 22, 2023
Hello Andy! Eve Outdoor Cam has to be mounted in an upright position with the camera's microphone and speaker array facing downwards in order to prevent water damage. Best regards, Volker
Reply
Mar 23, 2023
Jan
Hello, How do I connect my Eve outdoor Cam after losing my homekit code?
Reply
Mar 4, 2023
Hello Jan! HomeKit technology provides advanced security with end-to-end encryption and authentication between Eve and your iPhone, iPad, or iPod touch. Your data is stored fully encrypted and can not be accessed by Eve Systems, Apple, or any other third party. Therefore the setup code provided is available only to you and no-one else and non-retrievable. If you have lost it, you need to replace the device.

The HomeKit code is on a sticker on the accessory and in the quick start guide.
On Eve Outdoor Cam you will find it on the mounting plate as well.
Best regards, Volker
Reply
Mar 6, 2023
I cannot find the code on the mounting plate, this is ridiculous!!!!!
Reply
Sep 1, 2023
Hello Wyatt! please open a ticket in our support system:
https://www.evehome.com/en/support/ticket
Best regards, Volker
Reply
Sep 1, 2023
There is no QR code on my eve camera and I’m stuck. I need to reset the whole thing as my WIFI has changed. How do I do it. I took the whole thing apart. No QR code or code numbers anywhere. Help.
Reply
Jun 8, 2024
Hello William!
HomeKit technology provides advanced security with end-to-end encryption and authentication between Eve and your iPhone, iPad, or iPod touch. Your data is stored fully encrypted and can not be accessed by Eve Systems, Apple, or any other third party. Therefore, the setup code provided is available only to you and no one else and is non-retrievable. If you have lost it, you need to replace the device.

The HomeKit code is on a sticker on the accessory and in the quick start guide.
On Eve Outdoor Cam, it is on the mounting plate (1) as well.
Best regards, Volker
Reply
Jun 10, 2024
Peter Botz
Gesichtserkennung, ich möchte gerne Streams und Mitteilungen unterbinden wenn wir selbst im Blickfeld der Kamera sind. Für namentlich bekannte Personen lassen sich Mitteilungen ausblenden, heißt es in der EVE Beschreibung. Wie und wo lässt sich das einstellen?
Reply
Feb 12, 2023
Hallo peter! Das übernimmt alles die Steuerzentrale. Bitte öffnen Sie Eve Outdoor Cam in der App Home von Apple und tippen auf das kleine Zahnrad für Einstellungen. Wählen Sie Gesichtserkennung und hier Im Haushalt bekannt. Tippen Sie auf die erkannte Person, bei der Sie keine Mitteilungen mehr erhalten wollen und aktivieren Mitteilungen ausblenden. Viele Grüße, Volker
Reply
Feb 13, 2023
Andy
Zitat: "Die Einstellung Dauer legt fest, ob und wie lang über die allgemein eingestellte Dauer der erkannten Bewegung hinaus das Flutlicht aktiv bleiben soll."
Bei mir schaltet das Licht sich nicht ab nach dem keine Bewegung mehr registriert wird. Unabhängig von der Einstellung der Dauer...?
Reply
Feb 2, 2023
Hallo Andy, bitte öffnen Sie ein Ticket in unserem Support-System: https://www.evehome.com/de/support/ticket
Vielen Dank, Volker
Reply
Feb 3, 2023
Ralf
Ist es möglich die „Überwachungszione“(Alert-Zone) einzugrenzen oder ist es nur durch die Bewegung der Cam möglich?
Reply
Jan 14, 2023
Hallo Ralf! Mit Aktivitätszone können Sie einen Bereich definieren. Nur wenn Bewegung innerhalb des Bereiches erkannt wird, erfolgt die Aufnahme. Bewegung wird aber auch außerhalb erkannt
https://support.apple.com/de-de/guide/iphone/iph7bc5df9d9/ios
Viele Grüße, Volker
Reply
Jan 14, 2023
Torsten Winkler
Hallo, ich bekomme meine Kamera nicht verbunden.
EVE App sagt ich soll sie erstmal entfernen, sie ist aber gar nicht da.
MfG
Torsten
Reply
Jan 11, 2023
Hallo Torsten! Bitte öffnen Sie ein Ticket in unserem Support-System, das ist der bessere Platz:
https://www.evehome.com/de/support/ticket

Viele Grüße, Volker
Reply
Jan 14, 2023
Kevin
What is the idle draw and max power draw of this device?
Reply
Jan 8, 2023
Hello Kevin! Eve Outdoor Cam draws about 1.4W when idle or recording and the floodlight will draw less than 50 when on. Best regards, Volker
Reply
Jan 10, 2023
Mike
Hello, Will the camera and motion sensing work if the unit is installed below a existing light fixture? If the light is on, will that affect the operation of the Eve camera?
Reply
Dec 31, 2022
Hello Mike! No this won't interfere. The only thing that may happen: As the extra light is bright it may not switch to night mode (b&w) but stay in color mode. Best regards, Volker
Reply
Dec 31, 2022
Nic
Hi, I’d like to mount an eve outdoor cam to an area that is in full sun. It is in Australia, so the sun can be quite strong during the day. Will the camera withstand those weather conditions. Thanks
Reply
Dec 29, 2022
Hello Nic! I would not recommend doing this. Eve Outdoor Cam may not work when exposed to Australias sun. Best regards, Volker
Reply
Dec 31, 2022
Sven
Wäre es möglich die Eve Outdoor Cam als Videotürklingel einzusetzen z.b. durch die Kombination mit einem zusätzlichen Homekit-Taster? Wäre genial wenn ihr dazu einen „Software“-Klingeltaster in der Firmware nachrüsten könntet, den man dann mit einer „Wenn Gerät geschaltet wird“-Automation mit dem zusätzlichen HomeKit-Taster schalten könnte (->der physische Schalter würde somit den nur softwareseitigen Klingeltaster auslösen). Ist so was eventuell in Planung?
Reply
Dec 21, 2022
Hallo Sven! Automatisch geht das bei Kameras mit HomeKit Secure Video nicht, manuell ginge das schon. Viele Grüße, Volker
Reply
Dec 22, 2022
James
It’s not clear to me if this light can be set as a auto-nightlight as well, meaning can the light be on dusk to dawn in addition to motion sensing, or does the light only turn on with motion sensing? If it does have a dusk-to-dawn ability, how bright is the light? And can the light be controlled via Homekit and schedules/automations, such as time-based events?
Reply
Nov 15, 2022
Hello James! Eve always displays the floodlight - as an element in the Eve Outdoor Cam detail view - as a separate device. If you want the same convenience in the Home app, open the camera settings in Home and tap the "Show as separate fields" option. The floodlight now appears as a tile accessories. Tap and hold the tile and then tap on the small gear. In the field on top assign a name, I chose Flood Light.
Tap the tile to check the functionality.In can be used in automations then as well. Best regards, Volker
Reply
Nov 16, 2022
Alan
Hi, May I know can it support continue recording?? Or recording from some NAS?? Or it keep recording and upload to a FTP servers (sure will have some delay)??
Thanks Alan
Reply
Nov 9, 2022
Hi Allan! Sorry, but the answer is no to all questions. Eve Outdoor Cam is a camera with HomeKit Secure video and follows the rules:
https://support.apple.com/guide/iphone/configure-cameras-iph7bc5df9d9/ios
Recordings only happen on motion detection and are stored in your iCloud account only. Best regards, Volker
Reply
Nov 14, 2022
Gary
Hi can the camera speaker be set up to alarm if movement is detected. As its mainly going to be used as a deterrent security measure this is an important factor to scare people off.
Reply
Nov 8, 2022
Hello Gary! This can't be set it can just be used to talk. You may though set alarms using a HomePod mini. If you have a HomePod, HomePod mini or any other AirPlay 2 speaker and a subscription to Apple Music (https://www.apple.com/apple-music/), you can use the loudspeaker as an alarm system in an automation in Home.
This automation only works in Home from Apple because developers like us do not have access to accessories that allow playback of TV, Apple TVs or the HomePod - only Apple can do this with the App Home.
Create an automation with a trigger from Eve Door & Window, Eve Window Guard, Eve Motion, Eve Cam (motion detection) or any other sensor and define when it should apply, such as time and/or presence/absence.
For the scene you select the HomePod and as audio source for example an alarm sound from the album Sirens Alarms and Horns (https://music.apple.com/de/album/evacuate-alarm/459056870?i=459057072) - done.
You can set the volume and duration of the alarm.
Best regards, Volker
Reply
Nov 8, 2022
carolin
can the light be switched on in the evening regardless of motion?
Reply
Nov 3, 2022
Hello Carolin! Yes you can turn on the floodlight whenever you want. Manua in the app or with an automation. Best, Volker
Reply
Nov 7, 2022
Marco
Hi. Can the recording be started manually? Or triggered by another event, like another motion-sensor?
Thanks for any feedback.
Cheers, Marco
Reply
Oct 22, 2022
Hello Marco! Recording can only be triggers by the integrated motion detector, this applies to all cameras with HomeKit Secure Video. Only Apple could change this. Best regards, Volker
Reply
Oct 25, 2022
Bruce
Is there a way to keep the Infrared night vision from turning off when motion is detected? Thanks
Reply
Oct 21, 2022
Hello Bruce! Sorry, but this is not possible. Best regards, Volker
Reply
Oct 25, 2022
Anton
When is PoE version coming? The AC only version has very limited install options, and as such seems utterly useless.
Reply
Oct 20, 2022
Hello Anton! Cameras with HomeKit Secure Video can't use PoE, sorry. Best regards, Volker
Reply
Oct 25, 2022
Jay
What is the operating temperature range of the Eve Outdoor Cam? Can it survive cold outdoor temperatures below freezing?
Reply
Oct 13, 2022
Hello Jay, the operating temperature is: -20 °C - 45 °C / -4°F - 113°F
Best regards, Volker
Reply
Oct 14, 2022
Frank
Hallo zusammen,
wo werden die Aufnahmen gespeichert? Und welche Einstellungen muss Ich vornehmen.
Habe Streamen und Aufnahme erlauben eingestellt.
Reply
Oct 13, 2022
Hallo Frank! Wie bei allen Kameras mit HomeKit Secure Video werden die Aufnahmen in Ihrem iCloud-Account gespeichert.
https://support.apple.com/de-de/guide/iphone/iph7bc5df9d9/ios
Viele Grüße, Volker
Reply
Oct 14, 2022
Axel
Hallo,
wie kann ich einen lauten Alarm bei Bewegung bekommen.
ich möchte einen Alarm bekommen wenn jemand sich unsere Tür nähert
Reply
Oct 8, 2022
Hallo Axel! Aktuell gibt es kein HomeKit-fähiges Gerät, dass als Alarmanlage arbeiten kann.

Wer über einen HomePod, HomePod mini oder einen anderen AirPlay-2-Lautsprecher verfügt, und dazu ein Abo von Apple Music (https://www.apple.com/de/apple-music/) hat, kann die Lautsprecher in einer Automation in Home als Alarmanlage nutzen.
Das ganze funktioniert nur in der App Home von Apple, da Entwickler wie wir keinen Zugang zu Zubehör haben, das die Wiedergabe von TV, Apple TVs oder dem HomePod erlaubt - nur Apple kann das mit der App Home.
Legen Sie eine Automations an mit einem Auslöser aus Eve Door & Window, Eve Window Guard, Eve Motion, Eve Cam oder einem anderen Sensor und legen fest, wann der gelten soll, etwa Uhrzeiten und/oder Anwesenheit/Abwesenheit.
Für die Szene wählen Sie den HomePod und als Audio-Quelle zum Beispiel einen Alarm-Sound aus dem Album Sirens Alarms and Horns (https://music.apple.com/de/album/evacuate-alarm/459056870?i=459057072) - fertig.
Sie können noch Lautstärke und Dauer des Alarm bestimmen.
Viele Grüße, Volker
Reply
Oct 9, 2022
Henkjan
Hi Volker, that worked indeed. no need to force the camera (or iPhone during setup) to the 2.4 band.
And the camera feels super solid. I do have to say the WiFi range was worse than expected. my iPhone has good connection at the spot the camera is mounted but in order to connect the camera I needed to order an extra WiFi point.
it is mounted about 6 meters from the router. I would expect that to work. what is your experience in allowed distance?
BR henkjan
Reply
Aug 30, 2022
Hallo Henkjan!
6-8 meters from the router/access point should be ok as the distance. Please keep in mind it needs to stream 1080p video so it needs to be closer than expected. Best regards, Volker
Reply
Aug 31, 2022
Hi Volker,

I also think it should be ok but outside is always tricky.
I do have to say the detection of people, animals cars is excellent.
and the small preview in the rich notification is exactly the fragment you would want to see.
no false positives so far.
really good, also compared to other cameras.

BR
Reply
Aug 31, 2022
Add new comment